Survival Tools Every Adventurer Needs

Surviving in the wilderness – no matter the time of year or location – depends more on wit than the gear you have in your backpack. But all survivalists still recommend assembling an emergency kit of tools to stay with you at all times in the wild. Why? Because if you happen to get injured or lost, the right gear can mean the difference between a comfortable night spent outside and a cold one—that’s why.
Survival Tools To Save Your Life
Did you know that the average healthy adult can survive up to three weeks without eating food, but only three days without drinking water and three hours outside of their core body temperature? Knowing this, what to include in your survival kit can literally mean the difference between life and death. The good news is, you can greatly increase your chance of survival—if you have the right tools with you.
Not sure which tools to pack for your next adventure? We’ve got your back! Keep reading to learn which survival tools every adventurer needs.
Fire Starter
Starting a fire outdoors is one of the most important things you need to be able to do if you are to survive in the cold, cook yourself a meal, and fight off hungry predators. However, starting a fire can be tough.
This is where a durable fire starter becomes the number one critical survival tool to have with you at all times. We love the Stealth Angel Arc Lighter because it doesn’t even require a flame. The powerful electric dual-arc plasma-based beam will instantly set material on fire, without having to cup your hand over a flickering flame or pray you have enough fuel left.
Survival Knife/ Multi-Tool
Choosing the right survival knife, multi-tool, or a combo of the two is a pretty personal decision. Find a tool that has features well-aligned with your specific skills and the type of tasks you anticipate performing and is the right weight and size for your survival kit.
Some individuals tend to feel safer knowing they have a knife in hand, while others prefer to stick to just a multi-tool that won’t attract attention. There are compact, machete-like blades that will help you chop firewood, and there are multi-tools packed with the essentials like scissors, a file, mini knife, and bottle opener. Whatever you choose, always be sure to keep it in your pack.
Map And Compass
You shouldn’t ever rely solely on GPS when in a survival situation. You should also carry a local map and compass with you to help navigate your way back to safety. It’s good to have both a road map and a topographic map on you, just in case. These items are compact, lightweight, and easy to pack, so there is really no reason not to carry them with you in your survival kit.
First Aid Kit
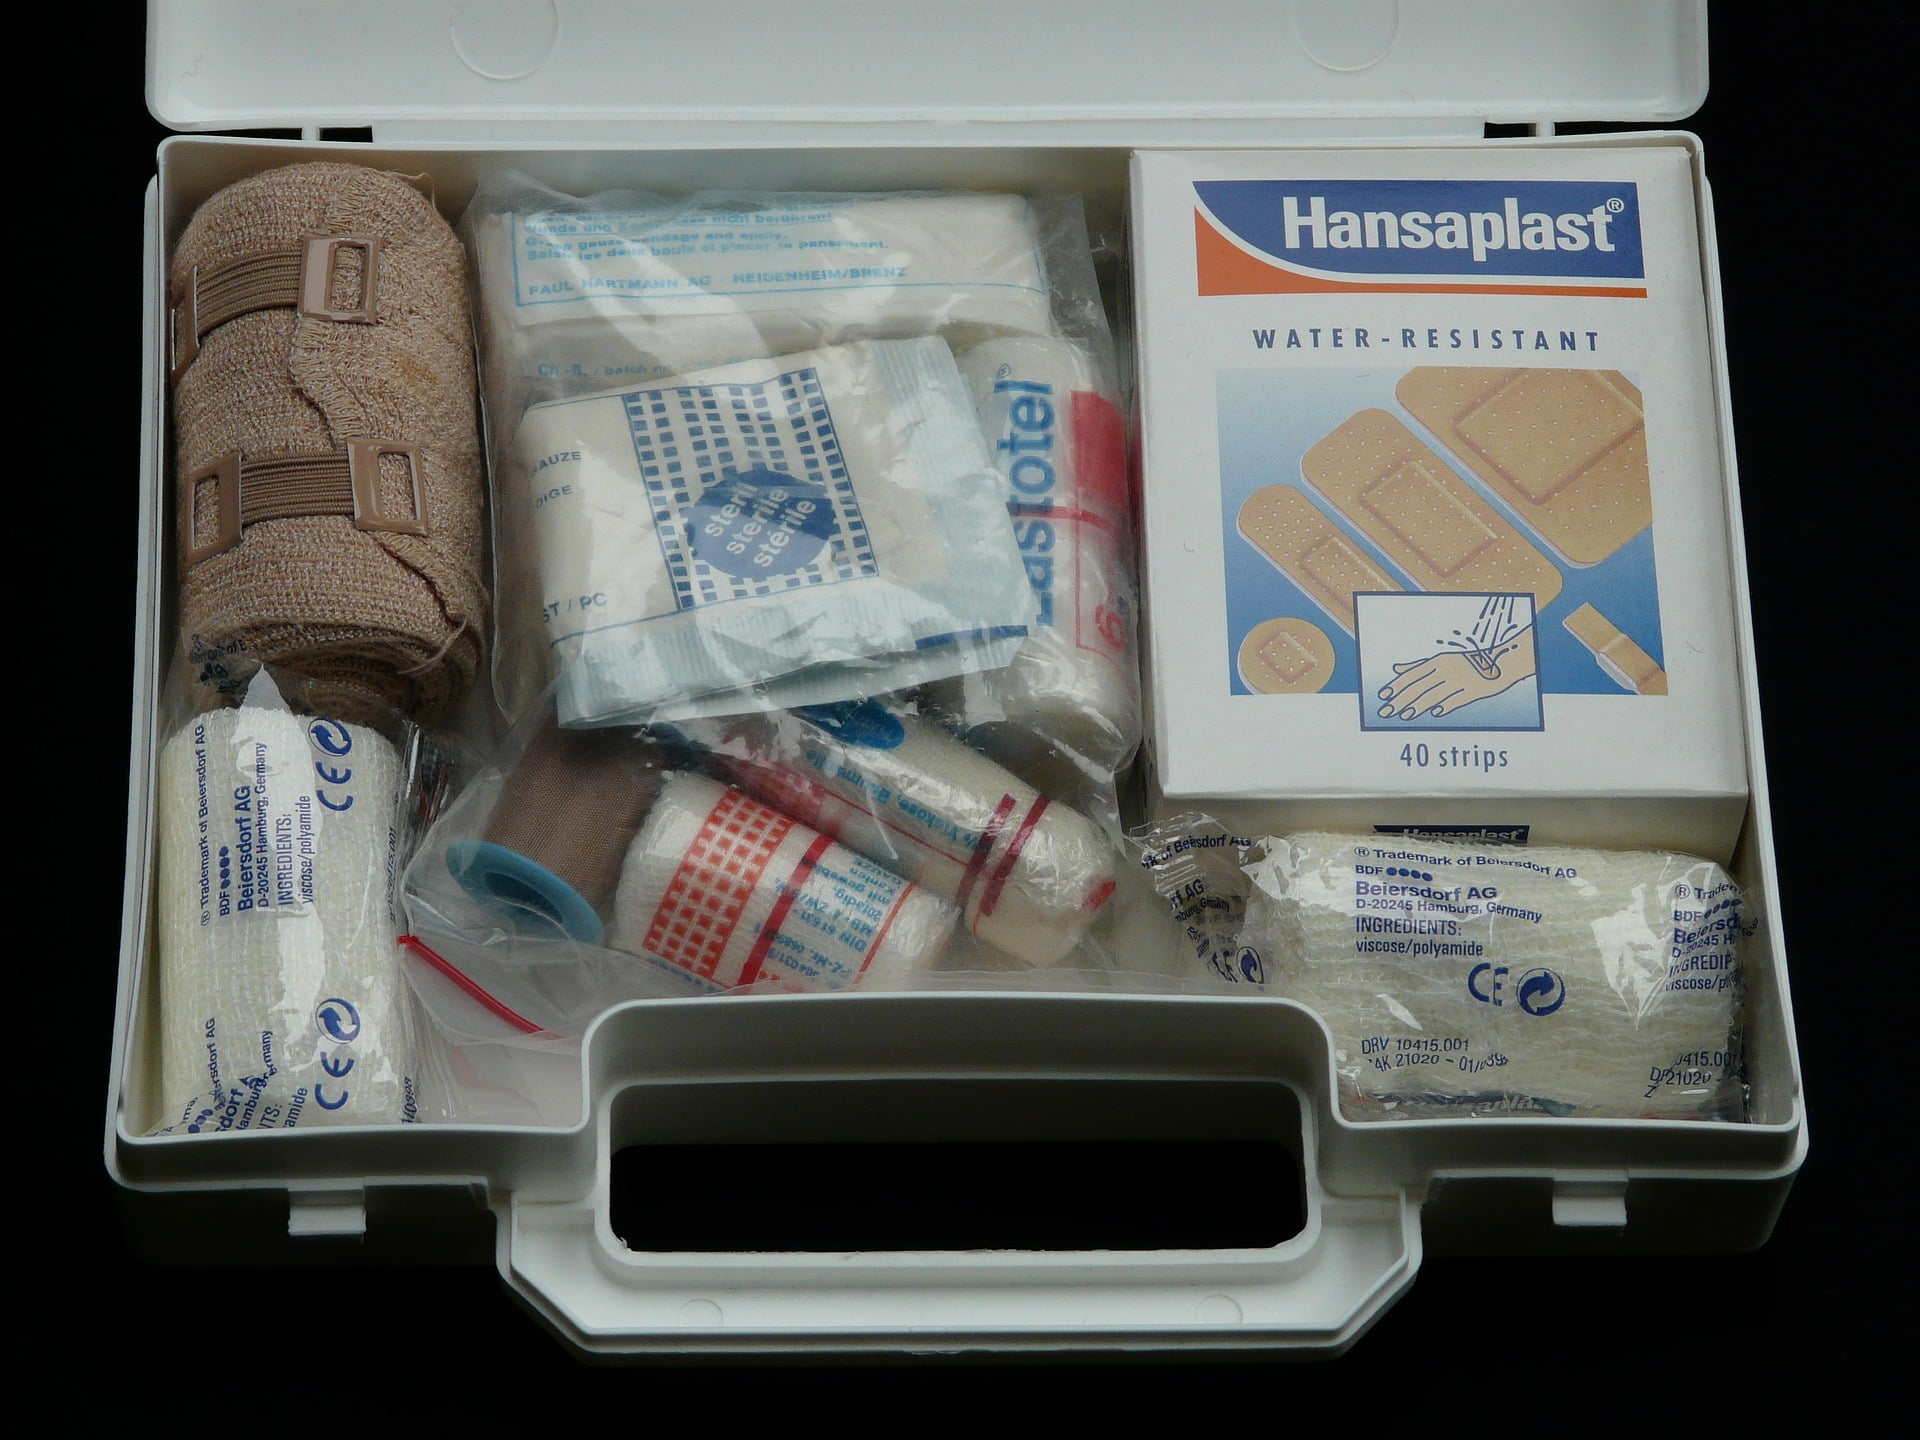
A first aid kit is a critical survival item that should be accessible at all times. When putting together your medical kit, think beyond band-aids and antibiotic ointment for scrapes and cuts, and be sure to include other items that can double as survival tools. For example, ACE bandages can serve a variety of purposes, splints for supporting fractures, gauze pads for larger wounds, steri-strips to help close wounds with uneven edges, and alcohol prep-pads that can be used for a variety of purposes.
You can save a lot of guesswork by purchasing a great first aid kit specifically designed for outdoor survival. We love the Stealth Angel Survival Field Medic First Aid Kit because it is packed with 36 first aid supplies and literally bursts at the seams with everything you may need in a survival situation, from tools like glass breakers and fire-starters to swabs, bandages, compresses, and more.
Be sure to keep one of these kits in your pack at all times. It’s also a good idea to purchase a separate first aid kit and keep it in your car, especially if you’re frequently car camping or rocking the van lifestyle.
Emergency Survival Whistle
A powerful, loud whistle comes in handy for all sorts of wilderness applications. It is one of the most essential survival tools when you’re frequently going into the backcountry where people are few and far between—and wildlife is abundant.
A loud whistle of at least 100 decibels will cut through ambient noise and travel great distances. Keep your whistle attached to your person—not just your pack—in case you get separated from your gear.
Paracord
Everyone from serious campers to the hobbits in The Lord of The Rings will expound on the importance of traveling with rope. But for the modern survivalist, paracord—which was invented in 1935 for military use—is the way to go.
Paracord is made of lightweight, sturdy nylon and multiple strands of fiber and is incredibly useful as a survival tool. It can be used to repair gear and rig tarps, taken apart for sewing thread or fishing line, or even braided together to create a broader, stronger rope.
A wearable survival rope, like the Stealth Angel Paracord Survival EDC Belt, gives you access to rope on your person at all times.
Water Filtration
Did you know that the average human can only survive three days without water? With that in mind, it goes without saying that water is of the utmost importance when it comes to survival. Not only should you always carry more water than what you think you’ll need for your hike, but it’s also smart to have some type of water filter on hand, too.
In a survival situation, you may need to collect and treat questionable water while you wait for help. You might also need to treat water so you will have it on hand for cleaning wounds, repairing gear, or cooking food.
Flashlight / Headlamp
The only thing that is harder than being lost or trying to survive the unexpected is having to manage in the dark. Even if you are only planning a hike during the day, it is always wise to have your headlamp on hand, or at least a small pocket-size flashlight.
You never know when you might lose track of your time and surroundings, which could cause you to spend an entire night out in the woods. Our eyes become pretty much useless at night so make sure you are prepared and always keep a headlamp or flashlight in your emergency survival kit.
A Final Word
All in all, these are our eight survival tools that every adventurer should bring with them when they are out in the wilderness. It doesn’t matter if it is a short hike or a long one, you need to bring these essential survival tools with you. By carrying the right equipment, you will not just be able to take care of yourself in any survival situation but also help other hikers as well.
When putting together your survival tools for your emergency kit, be sure to purchase from a top-notch company like Stealth Angel Survival—the leader in emergency preparedness kits, supplies, and survival products. Whether you are looking for survival tools, first aid kits, or bug-out-bags, Stealth Angel Survival has your back!
Sources:
How To Store Water For An Emergency

H2O is essential for survival and an absolute necessity when preparing for an emergency. In the aftermath of an emergency or a disaster, clean drinking water may not be available, and water in your home may be cut off or even contaminated with raw sewage. If grocery stores are open, the massive demand for bottles of H2O may deplete the shelves within moments, without a viable way for stores to quickly restock.
So, how much water do you need, and how exactly are you supposed to store it for an emergency? Keep reading to find out!
How Much Water Do I Need?
The general rule of thumb is that you will need roughly one gallon of water per person per day. Half a gallon is used for drinking, while the other half is used for hygiene. That number will go up depending on a whole host of factors. For example, if you happen to live in the sweltering heat or have a pregnant or nursing female in your group—you’ll want to store more water.
Alright, so a gallon of water per person is the general rule.
So the question becomes: how many days without water should you prep for?
Well, that really depends on how prepared you want to be for varying degrees of disaster.
FEMA suggests that everyone have enough water to last three days should your regular water source be disrupted. Three days of agua should be enough to get you through the periods of water shut-off or contamination that can sometimes happen during natural disasters like tornadoes, ice storms, and earthquakes.
Three days is a good starting point, but even during run-of-the-mill disasters, water access can be down much longer than that…
Many preppers suggest that you should have at least two weeks’ worth of water per person on hand. So, for a single individual, that’s 14 gallons of water. For a family of four, that would mean you’d need 56 gallons of water.
Whether you decide to go above and beyond the two-week minimum is totally up to you.
How To Store Emergency Water
So, what’s the best way to store water for an emergency, you ask? Great question!
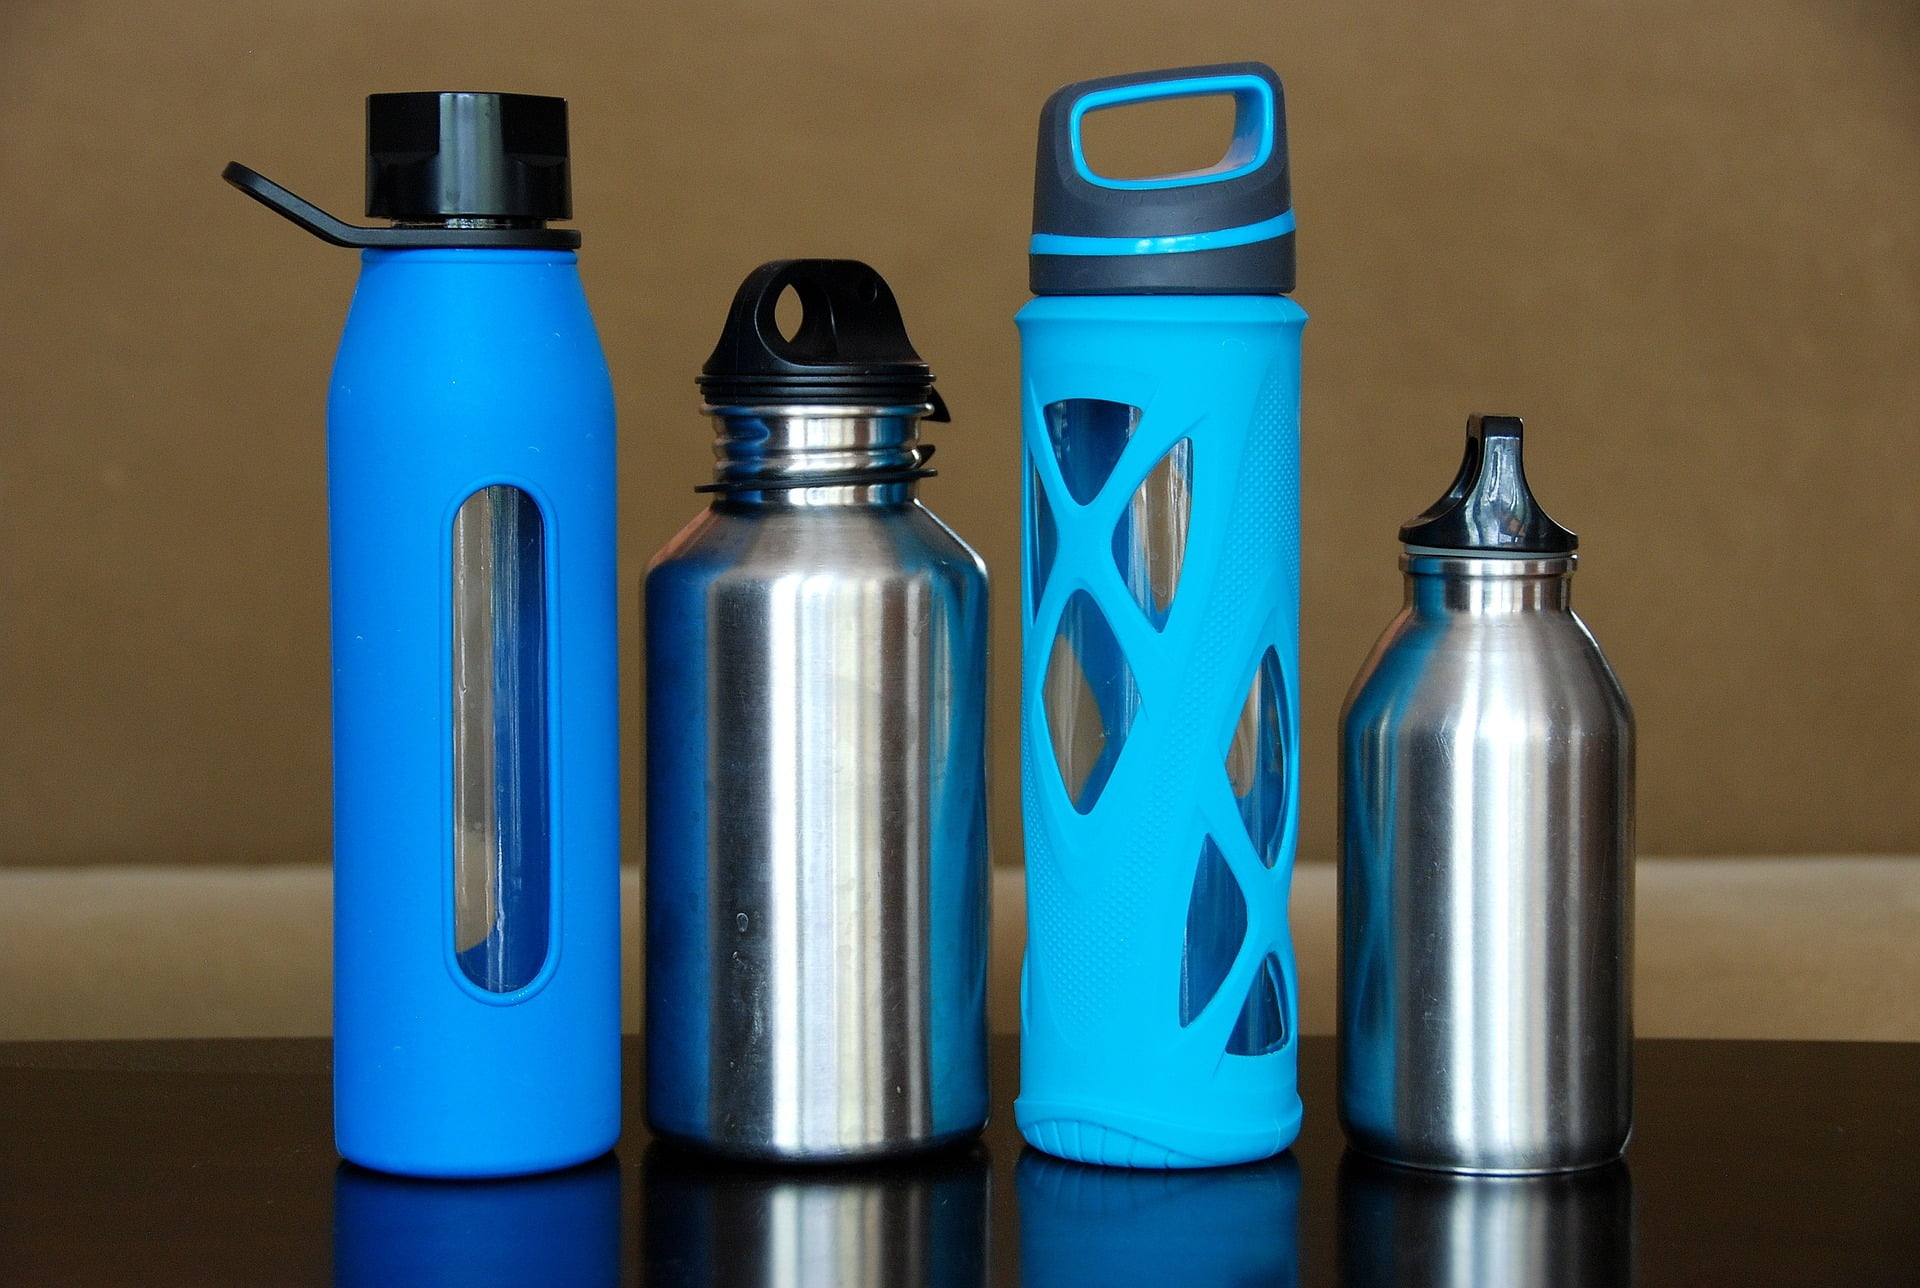
Filtered water in BPA-free containers is the best option.
Filtered water is far more eco-friendly than buying plastic water bottles at the store, which contribute to the billions of plastic water bottles occupying large volumes of landfills and polluting the nation’s waterways. So with that in mind—if you can—it’s best to store filtered water rather than tap water or commercially available water.
Make sure you use BPA-free water bottles or containers. The water should be stored in a dark, cool place, and check your emergency water supply every six months to make sure it has not been compromised.
If you happen to have a home filtration system, you have the option of storing your own water in environmentally-safe containers. Food-grade water storage containers provide the best option for H2O storage but make sure you wash them thoroughly with soap and water prior to use.
Also, stick with ones in the 3- to the 7-gallon range. When full, these are still portable by the average person. Any larger than that, and they start to get a bit on the heavy side, making them a little more of a challenge to carry.
How Not To Store Water
So now that you know how to properly store water let’s get some misconceptions out of the way.
First and foremost, just because the water is clear doesn’t mean it is safe to drink! Contaminants, in most cases, are often colorless, and no one likes drinking poison or parasites.
Think your drinking water might be contaminated? Never fear, Stealth Angel Survival can help! Be sure to always keep a Stealth Angel Personal Water Filter on hand so you can drink water without getting sick or exposing yourself to harmful pathogens.
Another great product to keep on hand is Portable Aqua Drinking Water Germicidal Tablets. When used as directed, these super tablets make most water bacteriologically suitable to drink. Perfect for an emergency situation.
Two, H2O does not have a real expiration date—but that doesn’t mean that you can rely on the same stored water in the same container forever, even if it’s stored in ‘perfect’ conditions.
And three, yes, you can die if you do this wrong. It is simple to store water safely for the long term, but if you do it wrong, you are putting your life on the line.
At the very least, you will get sick, and getting sick or injured is no fun—especially during an emergency or disastrous situation. For that exact reason, we are going to tell you exactly how you should not store emergency water.
Do Not store water in food-grade containers that have previously stored other items. We are talking about soda bottles, beer kegs, milk jugs, or anything that was used to hold another drink or food (or chemicals, oils, etc.).
Do Not store water in cardboard containers. Sure, that may sound obvious—but box water is definitely a thing, and the truth is that cardboard just doesn’t last very long.
Do Not try to store water in something that can’t be properly sealed. With only a few rare exceptions, storing open water is not a good idea by any means because it’s open to contamination. Particles from the air, insects, and even animals can fall into your water. Bird poop in your survival water is no good.
Do Not store water in metallic containers that are not stainless steel. Trust us—if it isn’t stainless steel, it will corrode, and your H2O will go bad fairly quickly.
Do Not store your emergency water in anything that has the chance of becoming contaminated. If you have any doubt that the container could become compromised, don’t store water in that container and find something else.
Do Not store your emergency H2O in direct sunlight or heat. You want a cool shaded, temperature-controlled room. Windowless pantries, underground cellars, basements, and temperature-controlled garages are smart locations.
Heat, sunlight, and changes in temperature tend to be hard on everything. These are the enemy of long-term water storage and will contribute to much faster spoilage. Heat and UV rays are hard on plastic, and sometimes even glass can leach chemicals.
In Conclusion
When an emergency strikes, it’s almost always unexpected—whether it’s an earthquake, tornado, hurricane, or something else. Emergencies can be stressful and anxiety-inducing, especially if you and your family are not prepared and don’t have the essentials like clean drinking water.
The unfortunate truth of the matter is that if you don’t have clean drinking water during an emergency, you are not going to make it very far in terms of survival. H2O is not just a luxury that we can sometimes live without—it is a necessity.
Stay a step ahead and always be prepared for the unknown by properly storing a gallon of water per person as a safety precaution. And if you happen to be dealing with questionable water, don’t forget to use your Stealth Angel Personal Water Filter to avoid getting sick. Trust us—you’ll be glad you did!
Sources:
How To Prepare For A Flash Flood

Even if you happen to live in a community with a very low risk of flooding, keep in mind that anywhere it rains—it can flood.
Just because you haven’t experienced a flood in the past doesn’t mean you won’t in the future. Flood risk isn’t just based on history—it’s also based on a number of factors, including rainfall, flood-control measures, topography, river-flow, and tidal-surge data, as well as changes due to new construction and development.
Floods are one of the most common hazards found throughout the world. However, all floods are not alike; some develop slowly, sometimes over a period of days, while others can develop quickly, sometimes in just a few minutes and without any visible signs of rain—these fast-paced, life-threatening floods are better known as flash floods.
But what exactly are flash floods, and what is the best way to prepare for them?
We’ll tell you.
Keep reading to learn everything there is to know about these dangerous floods and how you can properly prepare for them.
What Causes Flash Floods?
Flooding occurs in known floodplains when prolonged rainfall over a handful of days, intense rainfall over a few days, or an ice or debris jam causes a stream or river to overflow, flooding the immediate surrounding area. Melting snow can combine with rain in the early spring and winter; severe storms can bring a lot of heavy rain in the summer and spring, or tropical cyclones can bring intense rain to the inland and coastal states in the fall and summer.
Flash floods tend to occur within six hours of a rain event, or after a levee or dam failure, or following a sudden release of water. These disasters can easily catch people off guard. You won’t always have a warning that these deadly, sudden floods are coming, so if you happen to live in areas prone to flash floods— plan now to protect your loved ones.
What Should I Do In A Flash Flood?
Most fatalities caused by a flash flood occur because people either underestimate the power of fast-moving water or they simply are not prepared for an emergency situation. Follow these tips before and during a flash flood to keep your loved ones safe during severe weather.
- Make sure that you have an emergency plan and an emergency kit ready to go. If you are forced to evacuate, you need to know where to go. Learn the roads that are safe to travel during a flood and which roads are likely to collect water. It is good to have an escape plan formed before imminent danger so you and your family can quickly reach safe territory during flood conditions.
Also, be sure to prepare and store an easily accessible emergency kit packed with essentials like first-aid, flashlights, and batteries.
- Stay up to date on weather forecasts. If you have a cellular device, you are likely to receive a Wireless Emergency Alert during flash-flood conditions. It’s still a good idea, though, to be aware of possible severe weather conditions before these alerts are even sent out. The more notice that you and your family have, the better prepared you can be for weather hazards such as flash floods.
- Whatever you do, don’t wait until a warning to take action. As soon as you know one of these deadly floods is likely to occur—take action. Depending on where you’re located, this might mean evacuating to safer territory—just be sure to disconnect all appliances and utilities first. It might also mean getting off the street and finding higher ground.
- Immediately follow your local evacuation orders. You don’t have to wait for the orders to evacuate, but once these orders are given, you should immediately follow them.
- Move to the highest point possible and call for help. If it is too late to evacuate your home, move your loved ones to the attic or highest point possible—and then call 911.
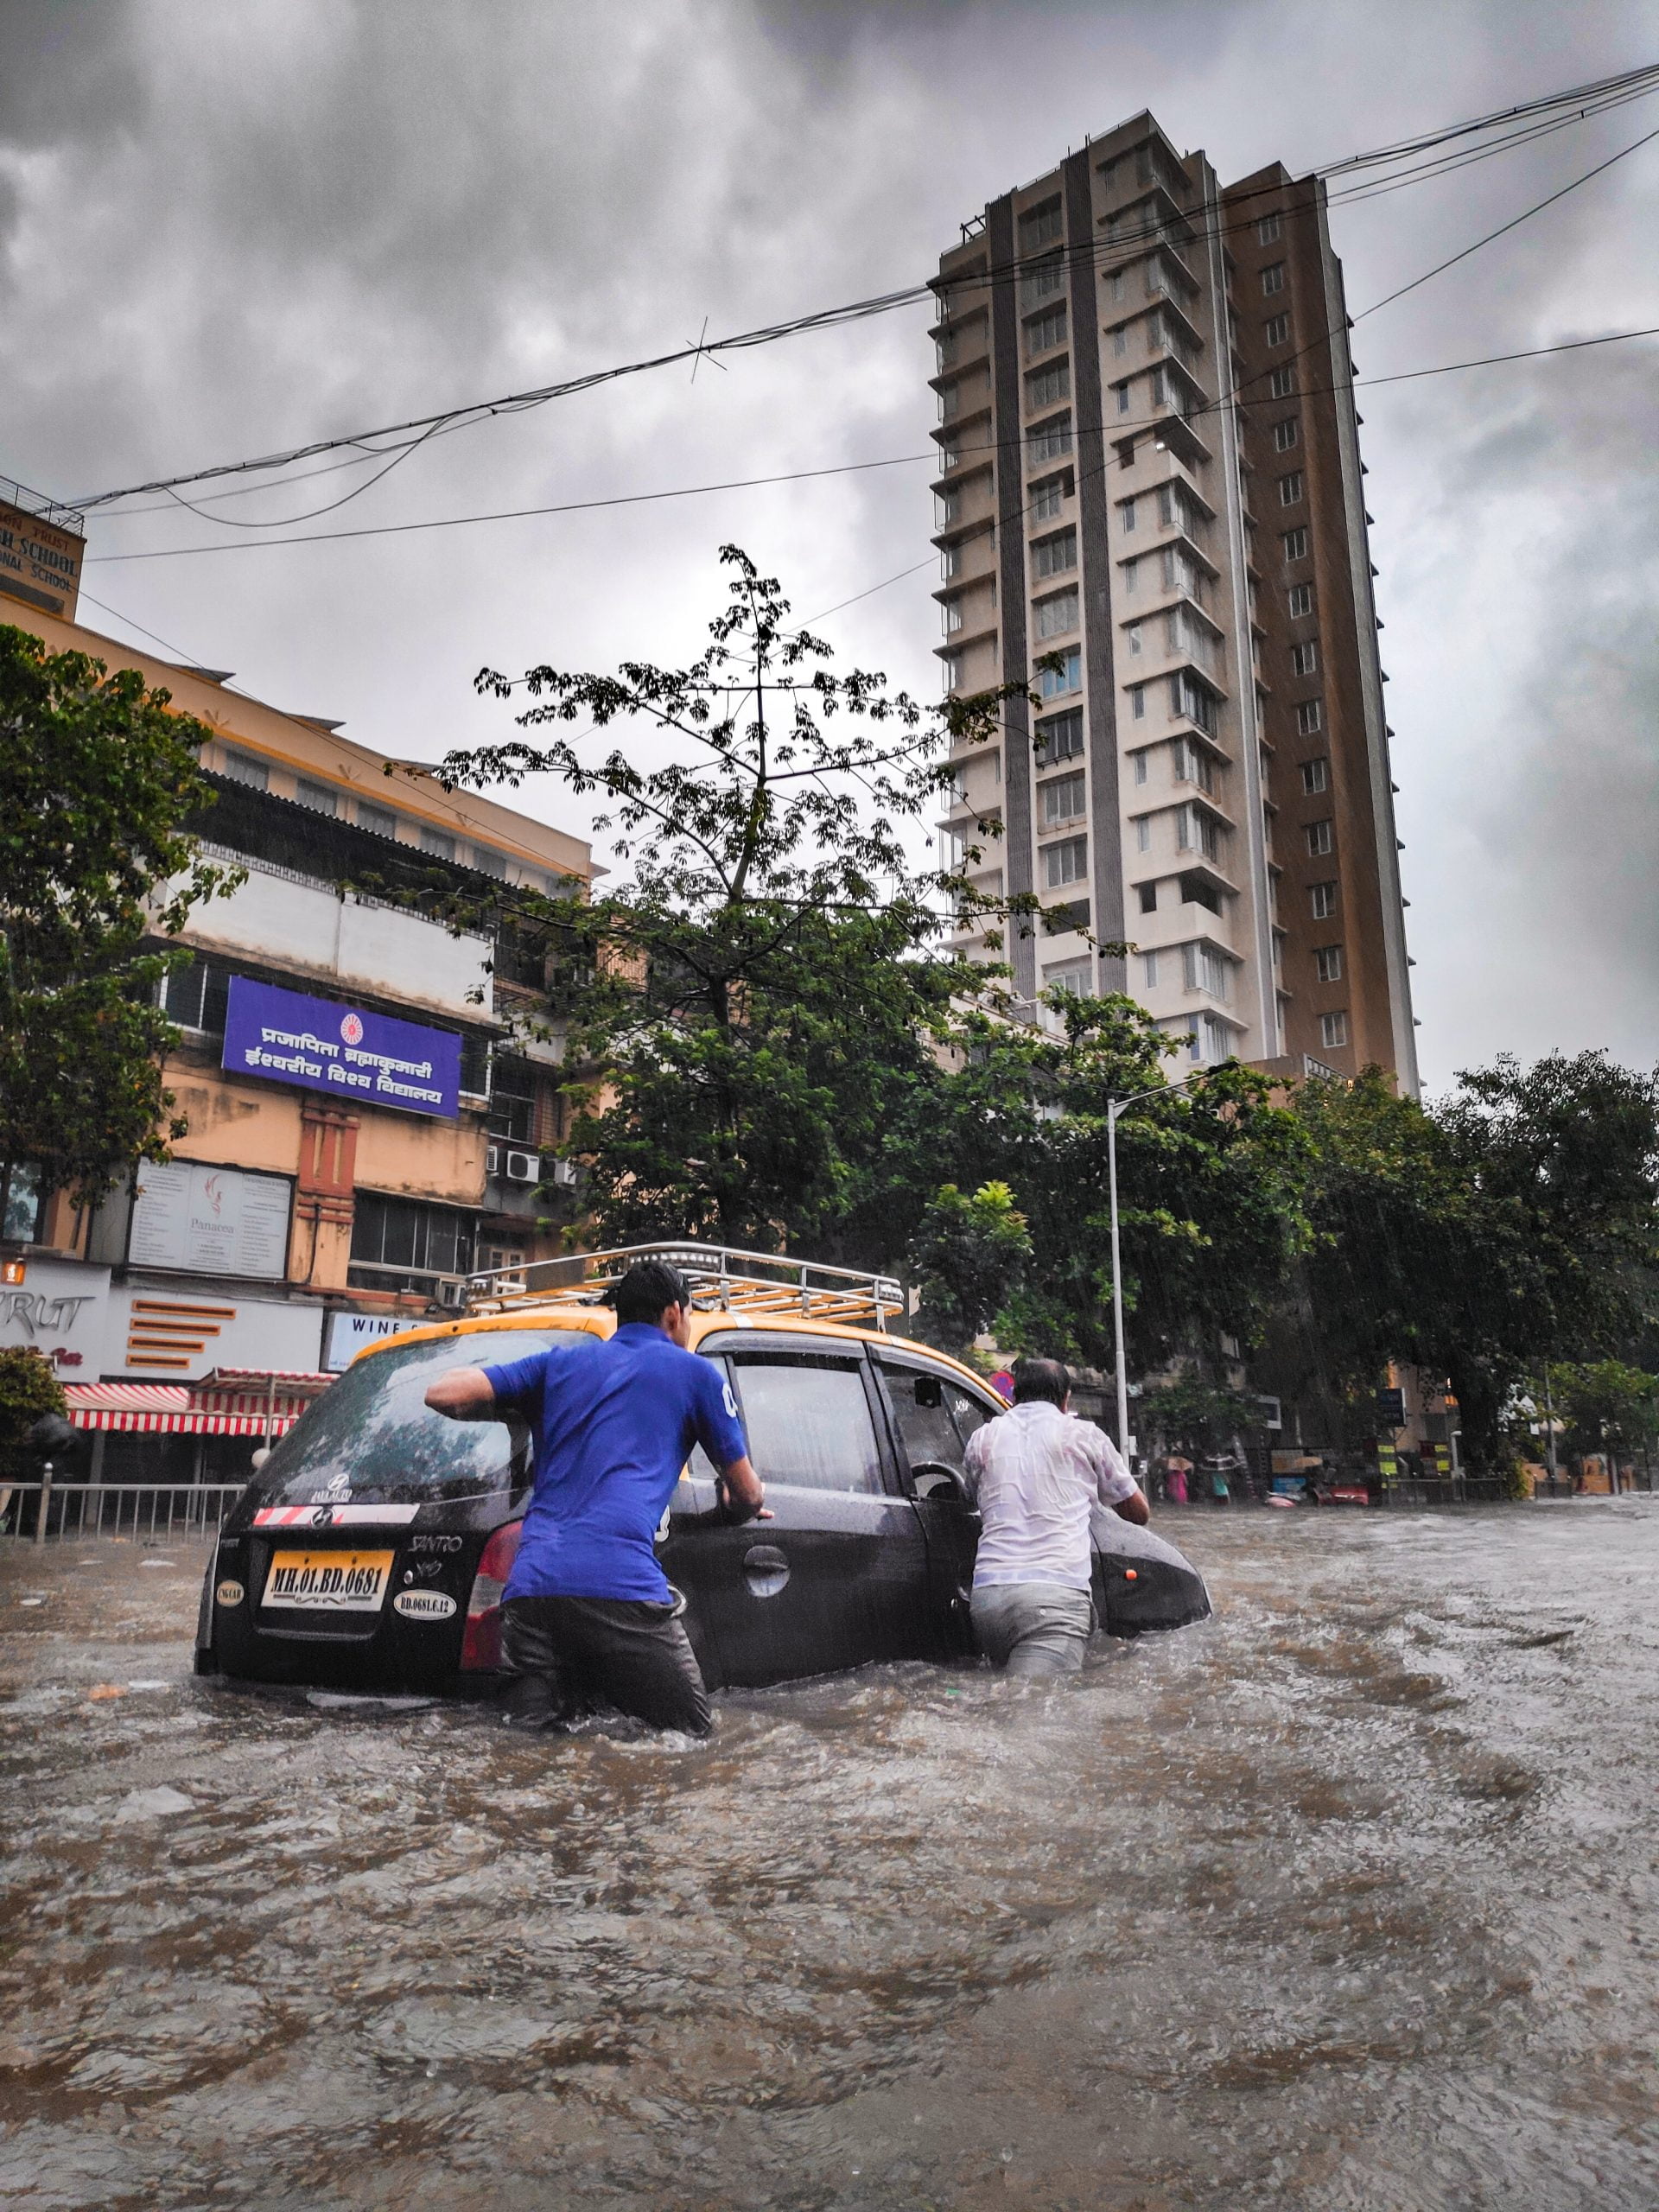
- Do not walk or drive near flooded areas. Over half of the flood-related deaths that occur happen when people drive their cars into floodwater. The next highest percentage of drownings are caused by people who try to walk into or near floodwaters.
It only takes 6 inches of fast-moving water to knock over most individuals and 12 inches of fast-moving water to carry away smaller cars. Never try to drive or walk through a flooded area. Turn around—don’t drown!
Flash Flood Watch Vs. Flood Watch Warning
It’s good to understand the difference between a flash flood warning and a flash flood watch so you can properly prepare.
Flash Flood Watch: Issuing a flash flood watch indicates that the weather conditions are favorable for a possible flash flood, according to the National Weather Service. It does not, however, guarantee that the area under the watch will see a flash flood, but it provides a heads-up for area residents or visitors.
Flash Flood Warning: On the other hand, a flash flood warning can mean that a flash flood is currently occurring or that one of these intense floods is imminent in the area under the advisory.
The moment you are given notice that there is a flash flood watch, you should start preparing by putting together supplies and your emergency kit. Once the flash flood watch has turned into a warning, pack up the family, and get to higher ground immediately.
What if the water doesn’t seem to be that deep?
You might be thinking that you can stick it out at home, seeing the water doesn’t seem to be that deep, but this is a grave mistake.
Flash floods can sweep away cars, knock over trees and telephone poles, as well as provide dangerous electrical conditions. Additionally, the most frightening part of this weather phenomenon is how fast the water is capable of rising. When a flood warning is issued for your immediate area, conditions can change quickly, and an area that may look safe at first glance may not actually stay that way.
Always be sure to use caution when dealing with a flash flood warning.
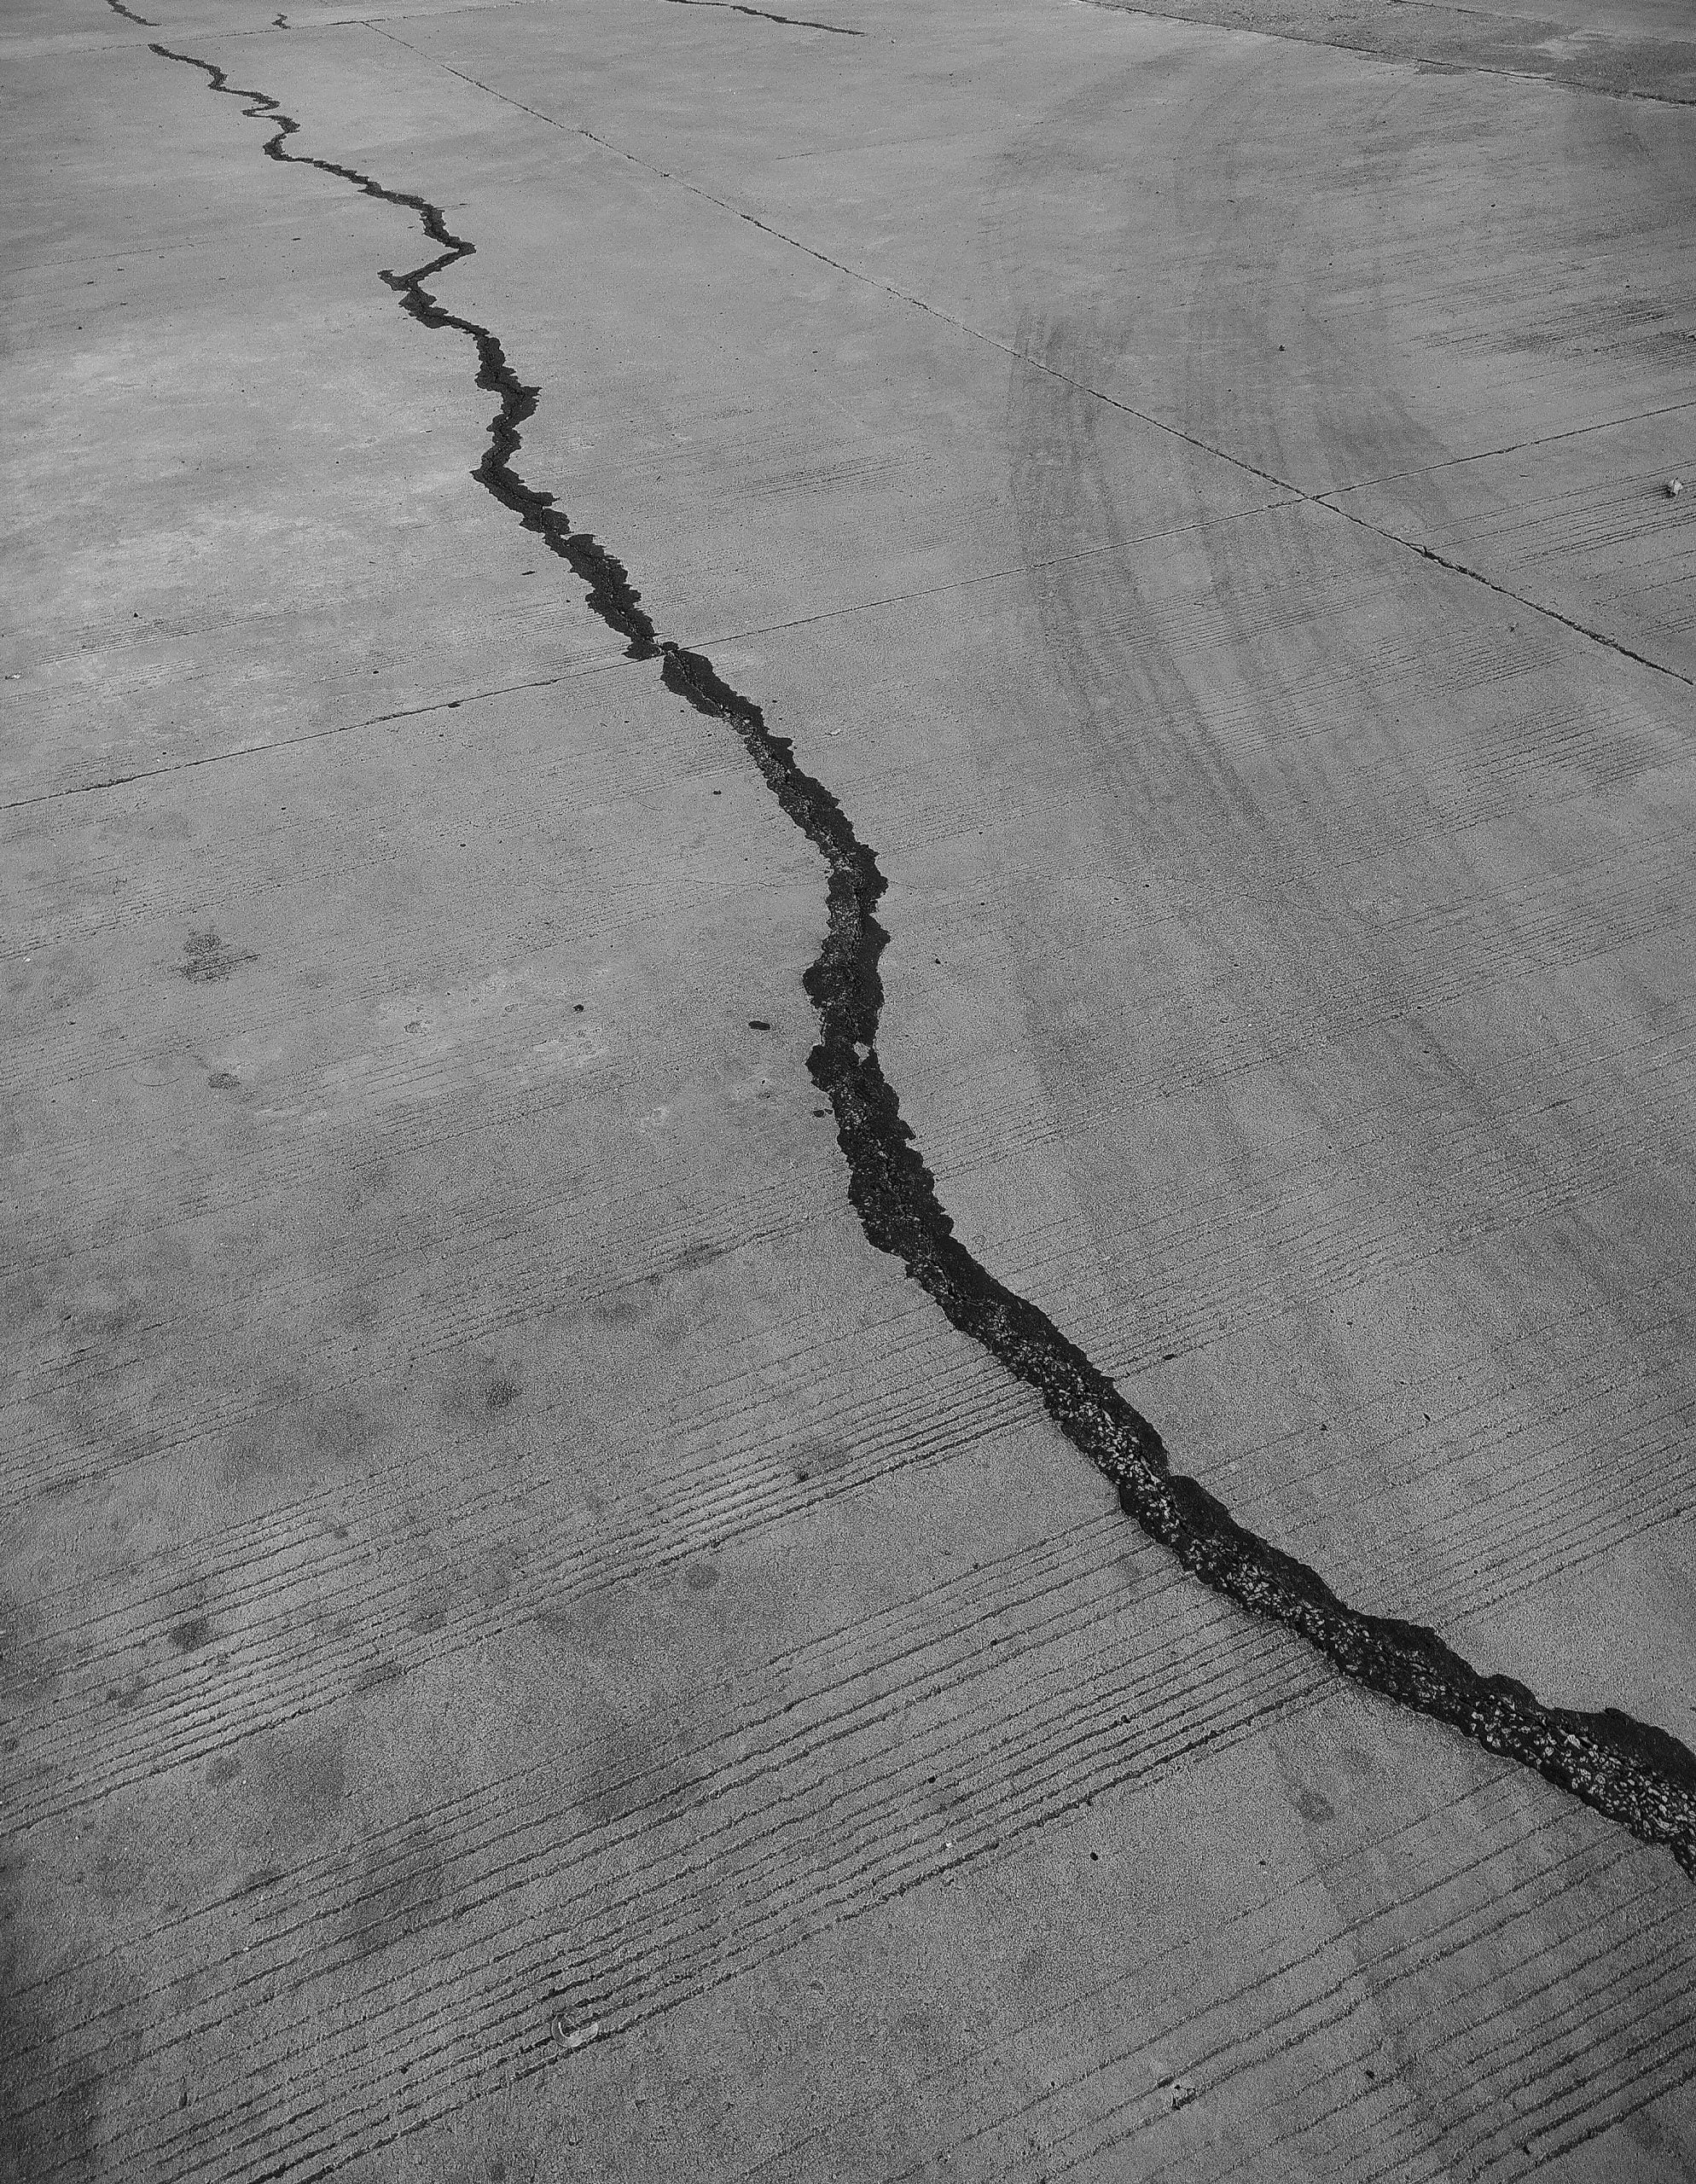
What areas have the most risk for flash floods?
Areas that are densely populated tend to create a large risk for flash floods in and of themselves. An increase in construction and the presence of paved surfaces like roads, highways, driveways, buildings, and paved surfaces can reduce the amount of surface area that is available to absorb rainwater. Runoff from these many paved surfaces vastly heightens the chances of a flash flood.
Conclusion
So, how should one prepare for a flash flood?
You can prepare for a flash flood by putting together a flash flood emergency plan. Knowing which roads are safe and which roads to avoid can mean life or death when one of these intense floods come through. It is also crucial to put together an emergency kit with all the essentials like flashlights, blankets, and a first aid kit.
Not sure where to get emergency supplies for your kit? Check out Stealth Angel Survival—the leader in emergency preparedness kits, supplies, and survival products. From bug-out-bags to first aid kits and everything in between, Stealth Angel Survival can help you to stay safe and prepare for the worst.
Sources:
https://www.earthnetworks.com/flooding/
How To Pick The Perfect Bug Out Location

Prepping is not necessarily a conventional lifestyle. Preppers are often called strange, paranoid, and outright crazy—but preparedness is never something to be ashamed of. In fact, disasters happen frequently and without warning all the time, especially in our ever-changing world of climate turbulence.
A crucial part of surviving a major disaster or an emergency—one that could lead to a societal collapse—is having a bug out location (BOL). But what exactly is it, and how does one find the perfect spot? We’ll tell you.
Everything You Need To Know About Finding The Perfect Bug Out Location
A bug out location is a piece of land, shelter, house, apartment, or a tent that you can evacuate to in case of an emergency or a disaster, and it is different than your home (your bug in location).
When choosing the perfect bug out location, there are a handful of factors to consider:
Accessibility
One of the first things you should take into consideration when picking the perfect spot is how easy it is to access. You really don’t want it to be too accessible, but you also don’t want it to be a three-day journey away as well.
You will want to be able to get to your location relatively quickly from the city that you live in. If an emergency or disaster situation were to strike, everything starts to happen very fast, and you won’t exactly have a whole lot of time to get ready to leave. It’s not like taking your friends and family for a casual road trip or car ride.
Every unnecessary mile you have to drive is another mile that you could encounter an obstacle or even a problem. While you might think the distance will make it safer once you get there, the truth is that none of that really matters if you can’t get there safely in the first place.
Take a little bit of time to really think about the safest route to take when traveling to your bug out location. Assume that the highways and main roads will either be blocked, bogged down with traffic, or even closed. This means you will need to identify a primary route where you can travel safely and undisturbed.
Buffer Space
Buffer space is one of the most crucial factors when it comes to the safety of your bug out location. All of the best bug out locations put a significant distance between them and the chaos that is happening in the rest of the world.
You could have the best location in terms of what’s on the land itself, but if it is pretty close to a city or a populated town, it’s not going to be safe… for long.
Part of the reason why you want this buffer is that the majority of the population will not be able to make it to your location, and putting a good amount of distance between you, your family, and them will significantly reduce the amount of potential unfriendly—and unwanted—encounters you face.
This makes it much easier for you to defend your space, protect your family, and monitor your land for trespassers or people who may mean you harm.
One tip that a lot of experienced preppers suggest is trying to make sure whatever structure or shelter you have on the land is not easily visible to the naked eye. This means having it tucked away from the street and, ideally, not visible from the air too. This is just another way to simply fly under the radar.
Nearby Water
This is one of the tricky factors that can really complicate your search for the perfect bug out location. It’s not that difficult to find some land away from the public, buy land with a source of H2O is a whole other story.
But trust us—it is well worth the extra time you spend searching.
As you probably already know by now, water is about as important as it gets when it boils down to survival. Why? Because you simply won’t last long without it—that’s why!
Having a source of water as your bug out location is not only convenient, but it’s also safer too. When you don’t have to leave your bug out location for this critical necessity, this reduces the number of potential encounters significantly. And believe us when we say that leaving to go duke it out with some desperate individuals for water is not something that you’ll want to deal with. Let the unprepared do that while you stay safe.
Any steam, river, lake, or pond is an option. It doesn’t have to be massive either. Just be sure not to forget your Stealth Angel Personal Water Filter so you can drink directly from these bodies of water without getting sick or exposing yourself to harmful pathogens!
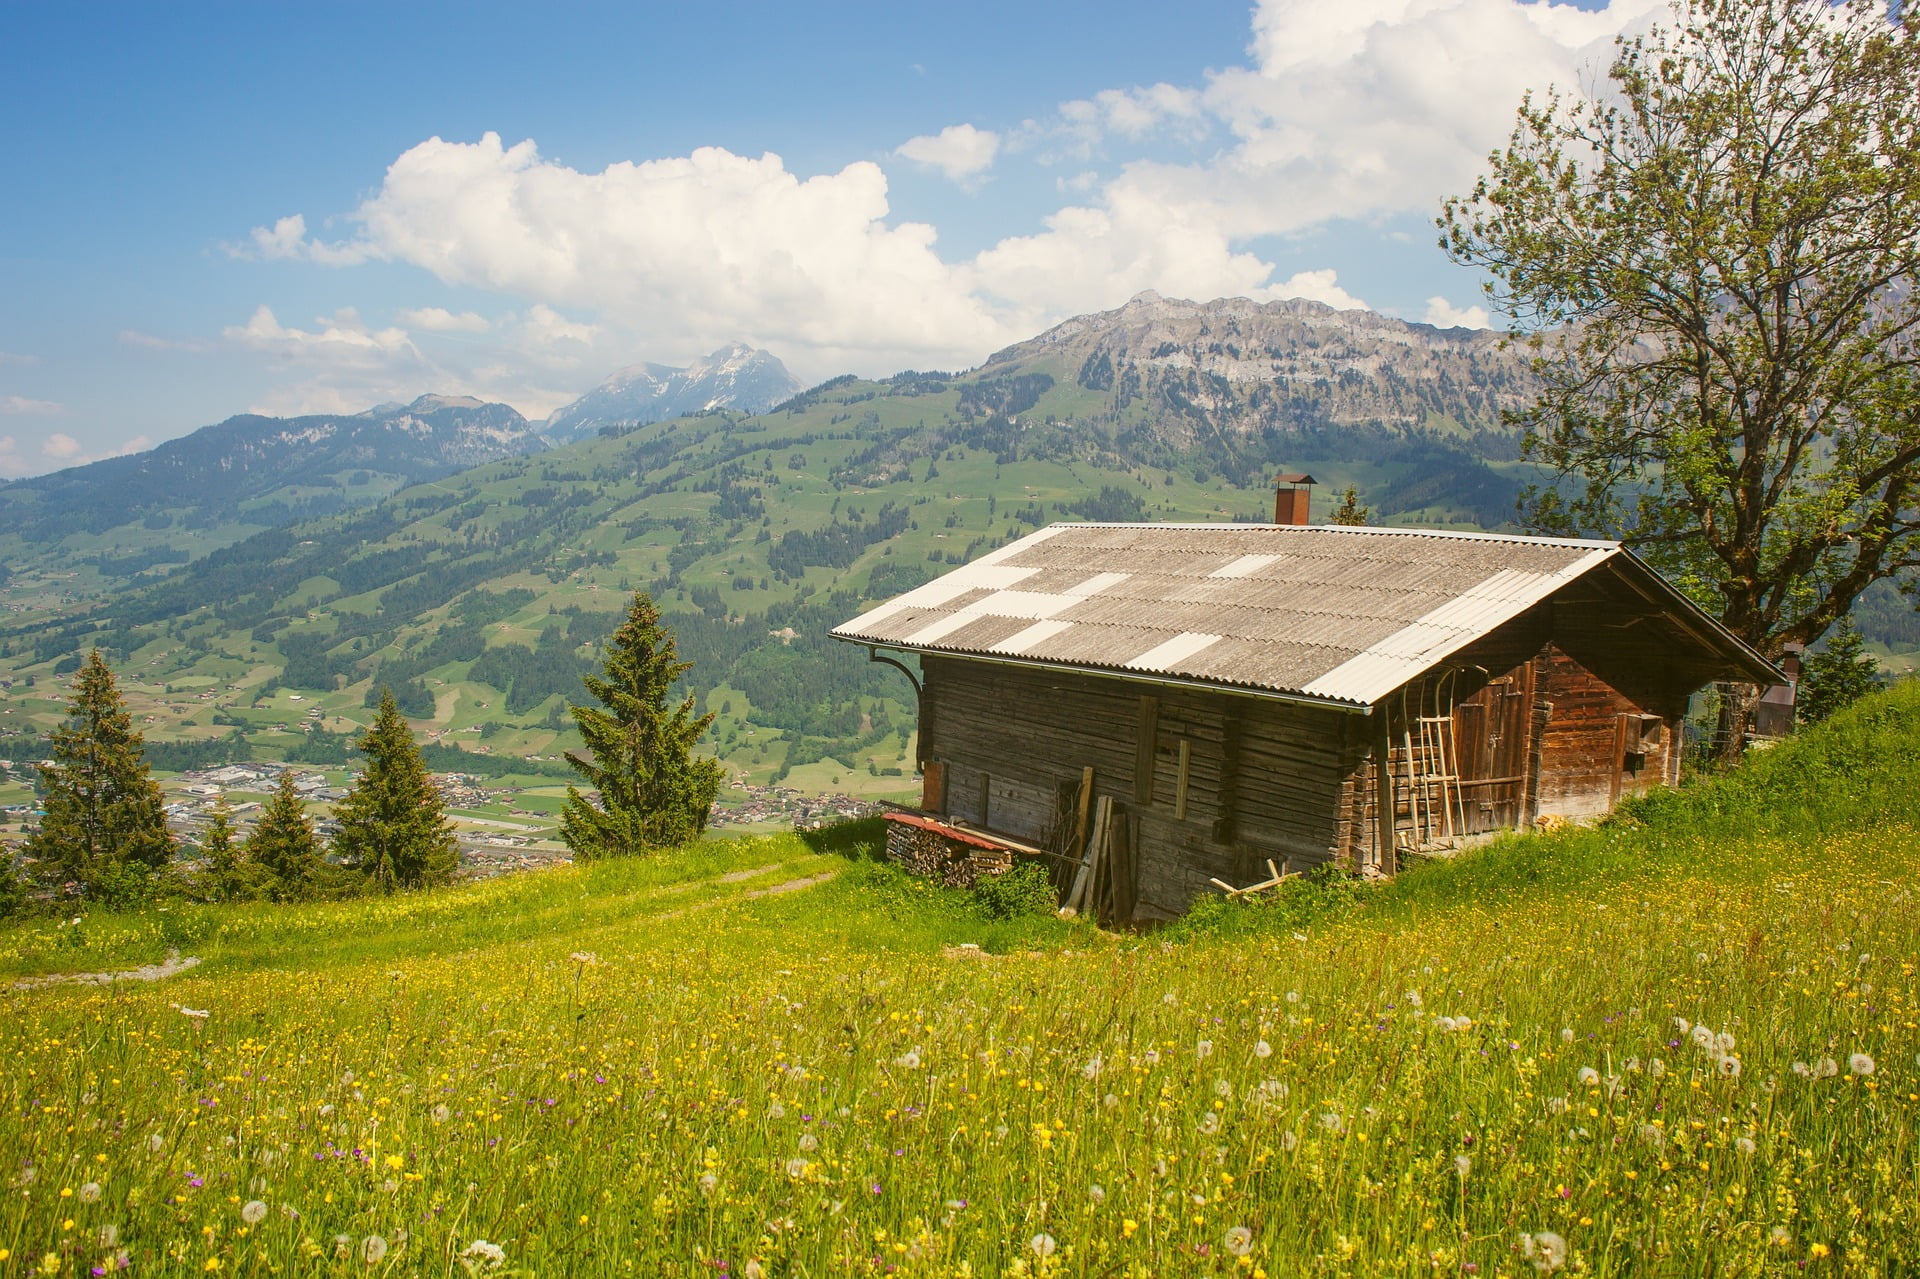
Living Structure
Having a plan behind the kind of survival shelter you want long-term to place at your bug out location is also important.
You might be able to find a perfect property that has an existing structure on it that you can work with. Other times, you will need to build your own.
Regardless, you will need to do some work to make sure the actual structure you are going to be using is suitable for an emergency or disastrous situation. Think about the weather that the area faces and if you will be protected from the elements.
This tends to be a hot topic for debate that comes with many different opinions from the prepping and survivalist community. Some preppers believe that a basic and simple, no-frills type of structure is best because it is unassuming and typically hard to spot. However, others think that you should go the extra mile and maximize comfort, safety, and security.
At the end of the day, the decision is up to you.
Long-Term Sustainability
The best bug out locations are usually set up in a way that the owners can survive there for a long duration of time. You don’t want to arrive at the location and have only a few days before you have to venture into the chaos and unknown to try and find food and supplies.
Water, food, and energy all play a part in this. Try and envision this before you decide on a property.
Is it possible for a garden to grow and thrive? Is there a good amount of sunlight and the right soil to allow plants to flourish? This is the most predictable food source you have, so you’ll want to make sure it is an option.
The presence of other animals to hunt and fish to catch is also a good sign. This will allow you to be more sustainable and keep your energy levels up.
Conclusion
Having a quality bug out location that meets all of these requirements can let you and your family sleep better at night. Just make sure it has all of these essential characteristics, and you’ll be good to go! Also, don’t forget your Stealth Angel Survival Kit and bug-out bag, which was specifically designed and developed to keep you safe in any situation—perfect in the event of an emergency or disaster.
Sources:
https://theprovidentprepper.org/bug-out-or-bug-in-how-to-know-when-to-go-or-stay/
https://www.ifrc.org/en/what-we-do/disaster-management/about-disasters/what-is-a-disaster/
How To Guide For Proper Camping
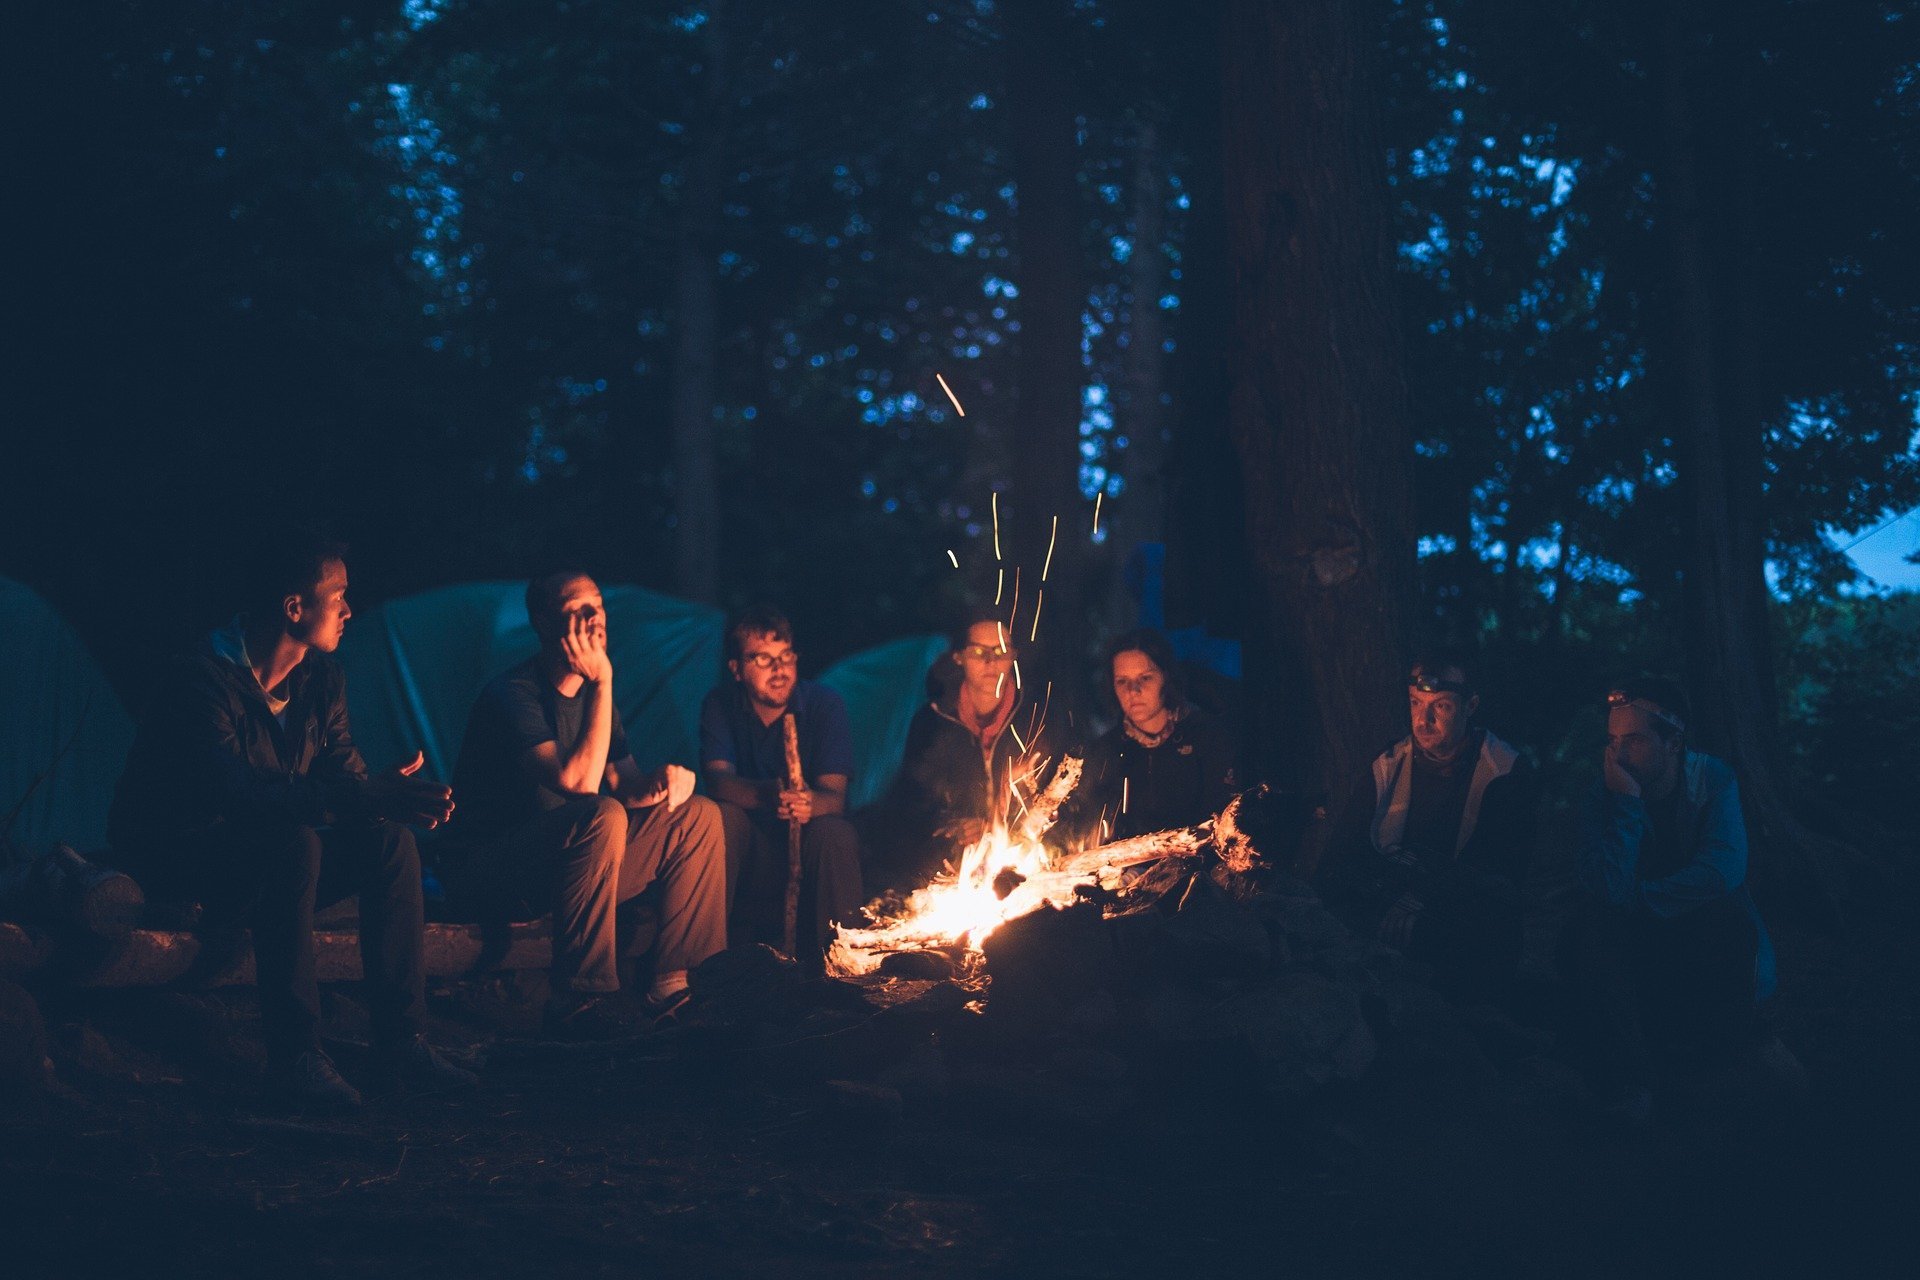

Campfires, tents, and long hikes through the wilderness come to mind when most people think about camping. But the truth is that there is so much more to a camping trip than just picking a spot and pitching a tent.
We live our day-to-day lives surrounded by the immense traffic of a relentlessly busy life. Dust, city lights, and smog cloud our vision of the stars at night; busy streets and skyscrapers prevent us from appreciating the charm of nature.
The solution? A great expanse of indigo sky looking over you, with shimmering stars serving as your rooftop for the evening. Camping in the midst of such natural bliss gives us a very much-needed reminder of the beauty that Mother Nature provides.
Sleeping in the wilderness provides the experience of a lifetime: a chance to detox from daily life and all the unavoidable stresses that come along with it. Nature is, without a doubt, the perfect antidote to calm your overwhelmed mind and escape the constant flow of difficult situations that life places in our path.
Are you thinking about going camping, but don’t know where to start? Keep reading to learn about all of the proper gear and equipment you’ll need on your camping trip.
Essential Camping Gear And Hiking Equipment
Camping is like staying in a primitive cabin—minus the cabin. So, in addition to your tent, it’s important to pack as though you’re going to stay someplace where there is little to no furniture, no stove, no refrigerator, no electricity, and the cupboards are bare. In a developed campground, you’ll have running water and a community restroom a few hundred feet away. A typical campsite has a table, a place to park your car, and a place to pitch a tent.
Here are a handful of tips to help you decide exactly what you need to bring for your first camping trip:
Tents, Tarps, Poles, Tie Downs, And Stakes
You will obviously need something to sleep in, so a tent should be at the very top of your priority list. There is no such thing as a one-size-fits-all tent, though. Tents come in a wide variety of types and sizes. Some ultra-light tents are best suited for backpacking while other, bulky and heavier options come with spacious luxury options best suited for hanging out near a vehicle. To confuse matters even more, most tents come in two different options: three-season and four-season.
Three-season tents are good for just about anything—except for the deep of winter—while four-season tents have more durable fabric and can handle snowdrifts.
Think about where you are looking to camp and choose your tent wisely.
Sleeping Bag
Like tents, sleeping bags come in many different weights and handle many different temperatures—so you have to do a little research to find the one that is best suited for you, where you plan to camp, and when. If you are planning on only going fair-weather camping, a summer sleeping bag is probably all you will need, but a 3-season bag will give you a little more leeway for unpredictable shoulder-season weather.
If you are always cold—or always hot—be sure to adjust accordingly. Also, it’s a good idea to purchase a sleeping bag that is lightweight and portable, like the ones found at Stealth Angel Survival. Transporting a sleeping bag that doesn’t weigh a hundred pounds will make your life so much easier when you’re camping—trust us on this one.
Sleeping Pad
A sleeping pad is like the mattress on a bed, but it also comes with high-tech insulation to prevent you from losing any body heat on the cold ground. Big air mattresses might look temptingly plush, but their lack of insulation will leave you feeling a bit chilly.
Take a look at the specifications when comparing sleeping pads—if one is longer, wider, or thicker and has a higher insulation value, it will be much more comfortable and do a better job at keeping you warm.
Pro Tip: Set your tent, sleeping bag, and pad up early, so you don’t get stuck having to do it in the dark!
Lighting
Campsites don’t usually have illumination, so you will need to bring your own. A flashlight is okay, but a headlamp will free up your hands for camp tasks. A lantern is nice for ambient light, and you can also build a campfire.
Cooler
You might already have a cooler, and it’ll probably work fine. Just be sure that you have enough capacity for your perishable food items and a few cold ones, along with enough ice to keep ‘em that way.
Stove
A classic two-burner propane camping stove should do the trick for your first camping trip. You won’t spend a fortune, and you can easily cook breakfast and prepare your morning cup of joe at the same time. But don’t forget to bring at least a couple of fuel canisters and a lighter with you.
We also love the Stealth Angel Ultralight Portable Outdoor Pot Pan and Stove Set. It is a compact, lightweight investment in your ability to make even fancy dishes in the wilderness!
Water Filtration And Treatment Tablets
If you’re camping, you should bring as much H2O as you’d possibly need in your vehicle, so it’s easily accessible. Some campsites even have fresh drinking water available, but you should bring some anyway—just in case.
If you are backpacking, however, that’s not an option, so you will need a water filtration system. We love the Stealth Angel Personal Water Filter because it eliminates 99.9999% of bacteria and then passes the water through activated carbon and antibacterial beads for an even more thorough cleanse—perfect for camping!
Hiking Shoes Or Boots
Depending on the type of camping trip you’re taking, you will want to grab some hiking boots or shoes. Your favorite pair of sneakers will do just fine in many places, but if you are planning on going for a longer backpacking trip, dedicated boots or shoes are much more comfortable since they offer more padding, stability, and support for your ankles as you cross rough terrain.
First Aid Kit
It shouldn’t come as a surprise that you will need a first aid kit for camping. You can either purchase a great kit from a company like Stealth Angel Survival or make your own first aid kit. If you decide to make your own kit, make sure to include supplies such as the usual aspirins, bandages, and gauze, as well as some hiking-specific stuff like moleskin for blisters, bug sprays, and aloe vera for burns.
A Final Word
Whatever you buy and pack for your first camping trip, just make sure to consider your climate, needs, and environment. If you are heading off to the desert for a long weekend in July, you can skip the rain jacket and thermal-insulated sleeping bag, but doing so would be foolish if you are heading into the rainforest.
Perhaps you want to do a little bit of fishing—in which case you will need a pole and some bait. Maybe you are going on a big bike camping trip, which requires not only camping equipment but also a slew of cycling-specific extras.
The fact is, regardless of the millions of generic camping guides and checklists out there, the items that you will need to bring with you camping really depend on where you’re going and what you’re doing. The items we listed above are a good start and will help on almost any camping adventure, but be sure to plan accordingly and purchase the right supplies.
Not sure where to get camping equipment? Check out Stealth Angel Survival, the leader in emergency preparedness kits, supplies, and survival products. Whether you are looking for flashlights and sleeping bags or water tablets and first aid, Stealth Angel Survival has your back.
Sources:
https://smokeybear.com/en/prevention-how-tos/campfire-safety/how-to-build-your-campfire
How Much Water Should Be Included In An Emergency Kit?


Believe it or not, storing plain ol’ H2O for an emergency is the most critical part of your survival kit. A natural disaster can limit access or even contaminate your municipal water source and can make a bad situation much worse. The body can handle a substantial amount of time without food; however, our bodies can succumb to the effects of dehydration in less than a week. Why? Because every cell in our body needs water in order to function, that’s why.
You can prepare for a natural disaster or another emergency by prioritizing H2O as the most critical element in your family’s emergency plan. But how much water, exactly, should be included in an emergency kit, might you ask?
Keep reading to find out!
Everything You Should Know About Storing Water For An Emergency
According to the CDC, it is recommended that you store one gallon of water per person per day for emergencies. Half a gallon for drinking, a quarter of a gallon for cooking, and a quarter of a gallon for bathing. This adds up to be about thirty gallons of H2O storage per person per month and a whopping 360 gallons of water storage per person per year.
A gallon of water weighs around 8.3 pounds. Water is not easy to transport because it can get pretty heavy. That means your emergency water plan should account for that.
Keep these items in mind when you’re planning. For example, you may want to put a gallon of water per day in your 72-hour kit. But that will weigh about twenty-five pounds. Are you and your kids strong enough? Will it even fit?
How do we do this?
Here is an approach to water storage. It is recommended that you have three ways of getting to clean water:
Store Water
Every shelter-in-place supply should have water storage. However, a small word of caution: Don’t try to go cheap on your water storage. Be sure to purchase a food-grade water storage container like a 55, 30, or 5-gallon container and use that. Don’t fill up your old milk jugs or juice cartons. They will crack more easily, and they are not designed for long-term storage.
The water containers and barrels are not very expensive, and when the time comes that you need the water, you’ll be glad you stored water you can actually use. Also, have a variety of different sized storage containers. Don’t just keep a 55-gallon barrel that you never move and never clean out or fill up because it’s so heavy. Use smaller, easier-to-transport containers like a 5 gallon stackable.
Have a Portable Water Filter
If you do happen to have the water stored, but you’re not exactly sure if it’s safe or you come across questionable water in an emergency. You don’t know if it is safe to drink, portable water filters are incredibly handy and will allow you to clean water that you come into contact with and make it drinkable.
These portable microfilters will remove harmful bacteria and protozoa from the water. If you have a lake, pond, stream, or river by your house, you will be able to drink the water using one of these filters.
We love the Stealth Angel Personal Water Filter because it begins with a layer of cotton and medical-grade, hollow fiber UF membrane, eliminating 99.9999% of bacteria by itself. After that, water will then pass through activated carbon and antibacterial beads for an even more thorough cleanse.
Have Water Purification Tablets
In addition to a great water filter like the one found at Stealth Angel Survival, water purification tablets are also great to keep in your emergency kit. These are very handy to have around because they work fairly quickly and will kill bacteria, protozoa, and viruses. The Stealth Angel Potable Aqua Drinking Water Germicidal Tablets are our favorite tablets on the market because they can make questionable water drinkable in as little as 35 minutes, and an unopened bottle should remain effective up to four years.
Keep in mind that if you don’t have any of these three things, you can still clean water by boiling it. As a matter of fact, boiling is one of the most effective ways to clean water, except it won’t filter out all the floaties. However, the issue with boiling water is it uses a lot of fuel that you may not want to use for that specific purpose.
Emergency Water Storage Tips
Nobody knows when an emergency will strike. However, what we do know is that we can only survive a handful of days without water. Water is critical to our survival because every single cell in our bodies require it in order to function properly. With that in mind, it goes without saying that preparing for an emergency by storing water is of the utmost importance.
Here are some tips for storing water in your home:
- Try to store your water away from heat and light.
- If you must store your water outside, make sure to store it in opaque containers so no light can get in.
- If you store your water in large drums, make sure you also store a siphon pump and a bung wrench so you can effectively get the water out.
- Do not store your water where it will freeze (frozen water is very difficult to use).
- Do not store your water containers directly on cement. Instead, place a piece of cardboard or scrap wood under them.
- You can store your water that is to be used for cleaning and bathing in old laundry soap containers or something similar.
- Keep all of your stored water away from stored gasoline, pesticides, kerosene, or similar substances.
- Clearly label all containers: “Drinking Water” vs. “For Cleaning Only.”
- It could be a good idea to store a container or two of water in the freezer to help keep food frozen should the power go out for a short period of time.
- If supplies run low, don’t ration your water. Drink what you need today—two quarts for normal people, more if it is extremely hot, or if you’re pregnant or nursing—and try to find more water tomorrow.
A Final Word
So, how much water should be included in an emergency kit?
According to the CDC, it is recommended that you store one gallon of water per person per day for emergency purposes.
Additionally, it’s also a good idea to keep other emergency supplies on hand, such as non-perishable food, blankets, flashlights, radios, batteries, and a first aid kit, just to name a few.
When looking for supplies, be sure to purchase from an honest and reputable company, such as Stealth Angel Survival.
Stealth Angel Survival is the leader in emergency preparedness kits, supplies, and survival products. Whether you are looking for a bug-out-bag or a way to make questionable water drinkable, Stealth Angel Survival can help!
Sources:
https://www.cdc.gov/healthywater/emergency/creating-storing-emergency-water-supply.html
https://www.cdc.gov/healthywater/emergency/making-water-safe.html
Everything You Need To Prepare For An Earthquake

Earthquakes are not a matter of if, but a matter of when. The U.S. Geological Survey says over 143 million Americans live in areas where earthquakes can occur and cause major damage. Yet, the majority are unprepared because of denial, complacency, or ignorance—the recipe for becoming a victim.
If you are one of the many who haven’t given much thought to preparing for disaster, there is no time like the present to start. Keep reading for everything you need to prepare for an earthquake.
How To Prepare For An Earthquake
Earthquakes strike suddenly, violently, and often without any warning. Planning and identifying potential hazards ahead of time in advance can greatly reduce the dangers of injury or even loss of life from a quake. Reinforcing, repairing, and building foundations, anchoring overhead lighting fixtures to the ceiling, securing furniture and other objects to the floors and walls, and following local seismic building standards will help reduce the impact of a quake.
Many earthquake-related injuries result from items falling or shifting due to the rumbling of the earth. Identifying potential hazards prior to a quake can protect you and your loved ones.
Do a quick inventory of your house and where you work. Anything that can fall or move during an earthquake should be placed in a cabinet that can lock shut or a secondary container. Anything that can’t be put elsewhere should be fastened down securely, or for objects such as bookcases, attached to the wall. Avoid hanging mirrors or pictures near beds, couches, or places where people sit.
After an quake, you might not have access to food, water, electricity, or other necessities for up to a week. Creating an emergency preparedness supply kit will help you get through the aftermath of an earthquake. Store enough food, water, and other basic items to meet your needs for at least three days. Keep the emergency kit in a place where you spend most of your time so that it’ll be easily accessible if an earthquake strikes.
It is also a good idea to develop an emergency communication plan. Don’t rely on your cell phone or other devices that require electricity. Develop a plan for reuniting with loved ones after the disaster if family members are separated from one another during a quake. Ask an out-of-state relative to serve as the family contact. After a disaster like an earthquake, it is often easier to call long distance than locally, so make sure everyone in the family knows the name, phone number, and address of the contact person.
Here are a few ways you can plan ahead:
Check For Hazards in The Home
- Place heavy and large objects on lower shelves.
- Fasten shelves securely to walls.
- Hang heavy items such as mirrors and pictures away from couches, beds, and anywhere people sit.
- Brace overhead light fixtures.
- Store breakable items such as glass, bottled foods, and china in low, closed cabinets with latches.
- Repair leaky gas connections and defective electrical wiring. These are potential fire risks.
- Store pesticides, weed killers, and flammable products securely in closed cabinets with latches and on bottom shelves.
- Repair any deep cracks in the foundation or ceiling.
- Secure your water heater by strapping it to the wall studs and bolting it to the floor.
Identify Safe Places Outdoors and Indoors
- Under large, heavy furniture such as a sturdy desk or table.
- Away from where glass could shatter around mirrors, windows, pictures, or where heavy bookcases or other heavy furniture could potentially fall over.
- In the open, away from trees, buildings, telephone, and electrical lines elevated expressways or overpasses.
Educate Yourself and Loved Ones
- Get in touch with your local emergency management office or American Red Cross chapter in the area for more information on earthquakes.
- Teach your little ones how and when to call 9-1-1, police, and fire, as well as which radio station to tune into for emergency information.
- Teach all of your family members how and when to turn off electricity, gas, and water.
Have Emergency Supplies On Hand
- First aid kit and manual
- Flashlight and extra batteries
- Emergency food and water
- Water filters
- Essential medicines
- Cash and credit cards
- Crank radio
- Non-electric can opener
Pro Tip: Rather than putting together your own emergency supply kit, purchase a pre-made one— just make sure you get it from a great company like Stealth Angel Survival to ensure you are getting top-quality supplies!
Develop an Emergency Communication Plan
- Make a communication plan for reuniting after the disaster in case family members are separated from one another during an earthquake.
- Ask an out-of-state relative to serve as the “family contact” and make sure everyone in the family knows that person’s name, phone number, and address.
What To Do During An Earthquake
It’s important to keep in mind that some earthquakes are actually foreshocks, and a much larger earthquake might follow. Minimize your movements to just a few steps to a nearby safe place.
If you are indoors, you should immediately drop, cover, and hold—drop to the ground, find cover under a sturdy table or another piece of strong furniture, and hold on tight until the shaking stops. If there isn’t a strong table or desk nearby, move to a corner or inside part of the building that is away from glass, and stay on the floor with your arms covering your head.
Stay inside until all the shaking has stopped and you are sure exiting is safe. Once outside, move away from buildings to open space.
What if you are in your car or driving?
The car is one of the worst places you can be during an earthquake. The moment you begin to feel a rumble, pull over to the side of the road, stop, and set the parking brake. Be sure to avoid bridges, overpasses, power lines, signs, and other hazards.
Stay inside your vehicle until the rumbling stops, then proceed carefully by avoiding fallen debris, cracked or shifted pavement, and emergency vehicles. If a powerline happens to fall on your car, don’t panic and stay inside until a trained person removes the wire.
A Final Word
After an earthquake, it’s most important to get to a safe location. Take your emergency supplies kit with you, check for injuries and hazards, and then help others. Once you’re safe, follow the emergency earthquake plan that you have prepared to communicate and reconnect with loved ones.
No one knows when a disaster might strike, but we can be prepared for them. Being prepared for an emergency situation like an earthquake can literally mean the difference between life and death. Think about it: if an earthquake were to leave you and your family trapped in your home for two weeks, how would you survive without the basic necessities like food and water?
Being prepared means having a plan and supplies readily available in the event of an emergency. Don’t be the victim of an earthquake because you didn’t properly prepare. Put together an emergency plan and supplies now.
Not sure where to get emergency supplies? Look no further and check out Stealth Angel Survival—the leader in emergency preparedness kits, supplies, and survival products. If you haven’t already, stockpile on supplies now—when a disaster strikes, you’ll be glad you did.
Sources:
How To Make A Snare: Beginner Guide For Survival

When planning for an emergency, it’s a good idea to stock up on food supplies that can be stockpiled without the need for refrigeration and have a plan for rationing. But what happens when the supplies are exhausted?
A crucial part of your disaster preparedness plan is learning a few hunting methods so you can be successful in a variety of environments. One of the easiest methods of hunting is by using a basic snare trap.
A basic snare trap is simply a noose connected to an anchor point, like a low branch or tree root. When prey passes through the noose, it tightens around the animal, constricting even further as it struggles against the snare. These types of traps are designed primarily for smaller animals, like rabbits and squirrels. They are not lethal, however, meaning you will need to kill your catch once it’s been caught.
Here is a step-by-step guide for beginners to make a snare.
Preparation
The first thing that you will need to do is choose a sturdy noose material.
- Choose a sturdy noose material.
To build a noose properly, the most effective material to use is wire. However, you can use anything as long as it is flexible and not too thin or brittle, and it must be able to tighten quickly and easily. There are a few wire types you can choose from:
- Headphone wire
- Stripped wires from cars
- Craft wire
- An uncoiled spring
If you don’t have a wire, you can use a string or cord, but just make sure it’s durable enough to hold a small animal. If it snaps under your personal strength, it probably won’t be strong enough.
The following items are suitable for a snare trap when a string or cord is not available:
- Fishing line
- Dental floss
- Shoelaces
If you can’t get your hands on wire or string, consider the tools found in nature. That means plant fibers and stringy tree bark. Sure, it may be more work, but if cultures did it in the past, so can you!
- Dogbane
- Milkweed
- Cattail
Next, you will want to scout out the area. A simple snare can be used night or day, rain or shine, and in any climate. Just make sure that animals pass by the area more than once in a blue moon.
Pro Tip: Keep an eye out for signs of game, like droppings, tracks, shelters, scratches, and signs of feeding for a good place to set up your snare.
Building random snares in random areas with no eye for signs of small games is a waste of time.
Once you’ve located the general area where you want to build your snare, look above you. What type of trees do you have to work with? The tree will be the ‘beef’ of your machinery.
- Find a sapling that is strong yet bendy. Keep in mind the tree must be able to hold the animal that you trap high in the air until you come back.
- If no saplings are in the area, look for a large tree limb and a large rock. This is an alternate technique that uses the same idea but doesn’t require a bendy sapling.
Building a Hook Trigger
Now it’s time to start building your snare.
Grab two sticks and carve a hook or mouth into them. Think of linking your own hands together—fingernails tucked into the other hand—and pulling your elbows apart. That is the tension that you will be using.
- The base should be longer than the mouth or hook and a little bit sturdier.
- The hook can be small, as long as it fits into the mouth of the base.
Then, you will need to plant the base into the ground. The base should be situated very close to the bendy sapling you scouted out; the two will work in tandem.
Pro Tip: It is much easier to drive the base into the ground if you carve it into a peg-shape first. The sharp point breaks the soil much more quickly and will save you a little bit of time trying to get it into the ground.
Once your base is in the ground, simply tie your cord or string around the bendy sapling. Make a tight knot that will not come off, even under tension. It should be about six to twelve inches from the top, depending on the strength of the sapling.
Place the hook in the mouth of your base. At this time, the base should be the only thing preventing your hook from flying up into the air, straightening out the sapling.
Pro Tip: Make sure your cord or string is the correct length. When the hook is in place, the sapling should be bent towards a 90-degree angle. When the hook is removed, the sapling should straighten up again, dangling the animal that you caught.
Again, always make sure that your knot is tight and securely in place. At this point, the hook should have two strings or cords attached: one to the sapling and one to the noose.
The snare is now in place and ready to go. All that’s left is arranging the noose, filling it with bait, and snaring your game.
Pro Tip: Make the noose wide enough so that it won’t miss your game. You can spread it out on the ground with pebbles or small twigs since they won’t interfere with it flying up when your target is securely caught in your trap.
A Final Word
Trapping is arguably one of the most essential skills that any survivalist can have. With these skills, such as learning how to make a snare, you won’t need to depend on commercial food sources such as your local grocery market.
Mastering trapping skills is no easy feat. However, you can still learn and master the skills with regular practice.
There are many different ways to make a snare, but most use the same principle of trapping their prey through a trigger and tension. Always remember to honor the animal that you killed, and be sure to utilize as much of it as possible.
You may not know when a disaster might strike, but what you can do is be prepared for it. Make sure you are ready and check out Stealth Angel Survival for supplies. Whether you are looking for equipment to help you build the perfect snare trap or a portable pot, pan, and stove set to cook your catch, Stealth Angel Survival is here to help!
Sources:
https://www.lilongwewildlife.org/2014/05/18/snaring/
https://www.curriculumvisions.com/search/S/sapling/sapling.html
https://boyslife.org/quizzes/153553/can-you-identify-this-animal-poop/
How To Dehydrate Food For Long Term Survival

Imagine this: an emergency or disastrous event takes place that forces the entire world to shut down completely. However, humans are still alive. There is a continuous life-threat outside the security of the walls of your home. There are no doctors, no hospitals open, no food supply, gas and electricity are shut off, and you and your family are stuck in a place with absolutely no help at all. Nobody has even the slightest clue as to how long this confusing situation will last.
In such an event, everything else can be managed. You’ll find a way to sleep without a comfy pillow and live in dirty clothes, but you won’t be able to live without food. With that in mind, dehydrated food is part of the emergency food basics that you should have.
Dehydrated food is easy and can be used to create tasty, healthy meals year-round. Not sure how to dehydrate food for long term survival? We’ve got you covered.
Prepper’s Guide To Dehydrating
The key to dehydrating food for long term storage is to remove any moisture from the food so mold, bacterial growth, and yeast can’t thrive. Dehydration should also be carried out to ensure that the food’s nutritional content is preserved. This enhances its longevity as well.
Estimates show that dehydrating food items results in nutritional and freshness loss of only three to five percent as opposed to a sixty to eighty percent loss due to canning. Alongside this, essential nutrients like vitamins and minerals are not lost or altered in the drying process.
This includes vitamin A and C, carbs, fiber, selenium, potassium, magnesium, and sodium. The result? You get nutrient-packed food that can be stored long-term.
Dehydrating food for long-term storage is not something most people think of, but it should be because it can result in shelf-stable food that lasts for 25 to 30 years.
How To Dehydrate Food For Long Term Storage
If you’re wondering about how to dehydrate food for long term storage, the first step is the equipment you will need.
You need to first invest in a long term dehydrator with solid trays that slide in and out. While nestled slotted trays are also a good option, stackable switchable trays are the most convenient.
Dry your food using a dehydrator with an adjustable thermostat for optimal results.
Some meats tend to take a little more time to dry at higher temps to enable long-term storage. Meat can be a little tricky, and the temperature should be stable and in the right range.
The dehydrator should have an airflow technology that evenly distributes heat to prevent extreme dryness outside and moisture retention inside. The basic dehydrators on the market eliminate moisture, while advanced models come with an auto shut off, fans, and digital timers. They also have a lot of room for drying space.
What To Dehydrate
When it boils down to how to dehydrate food for long-term storage, many issues can be avoided by selecting the right things. Certain foods may sound like a delicious treat during a disaster, but they won’t last very long or dehydrate easily.
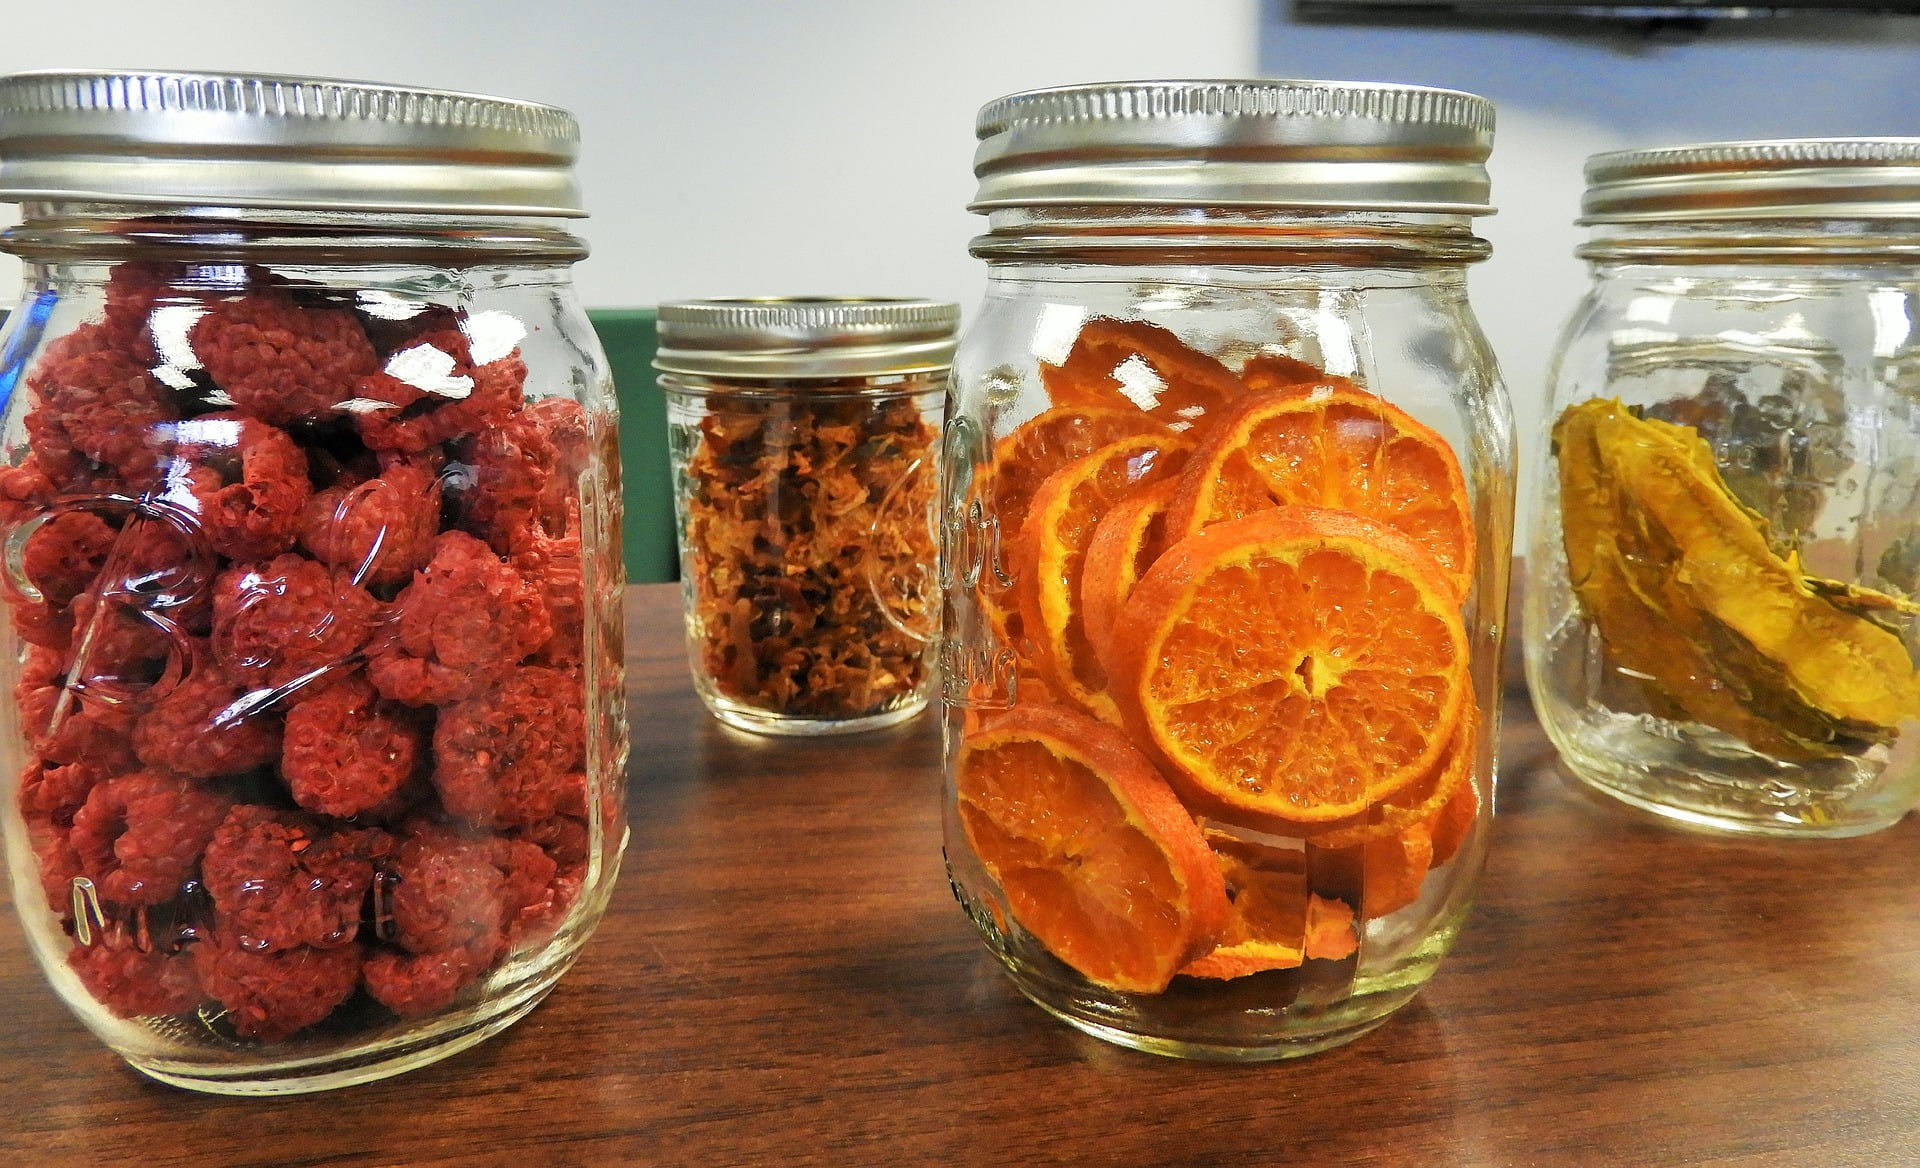
Here’s a list of tasty food items that you can dehydrate for long term storage:
Fruits
Dehydrated fruits and veggies are pretty much the best dehydrated foods. They work for vegans too! The process to dehydrate fresh fruits is to pick them when they are very ripe. Wash the fruit properly and cut them into thick slices. It’s much easier to dehydrate thinner pieces rather than whole fruits and thick slices. Some small-sized fruits can sometimes be dehydrated whole if they are not too dense.
Keep in mind that this process does lead to a little bit of fruit discoloration. Although this doesn’t mean that the fruits aren’t safe to consume, some picky eaters tend to get bothered by this. To prevent this issue, you can use ascorbic acid. Simply soak your slices in this acid before dehydrating them, and voila! No discoloration.
Vegetables
Veggies work pretty much the same as fruits. However, the main difference is that the quantity of acid is lesser than vegetables, so they tend to dry up much more quickly than fruits. To dehydrate, start by picking ripe veggies and washing them well. Then, cut the vegetable into thin slices just like with fruits. After that, you will have to blanch your veggies.
The process to do this is simple: boil the vegetable slices, followed by instantly putting them in ice-cold water once they are boiled. This is crucial so that the flavor and nutrients in the veggies remain preserved. After that, dehydrate them just like the fruits.
The recommended fruits and veggies to dehydrate for long-term storage include:
- Apples
- Bananas
- Cherries
- Plums
- Grapes
- Pears
- Tomatoes
- Beets
- Carrots
- Celery
- Corn
- Onions
- Peas
- Turnips
- Potatoes
Meat
When you’re thinking of how to dehydrate food items for long-term storage, you can’t ignore your protein supply. Without meat, you will have a really tough time surviving, because proteins are the main source of energy. Always stick with lean meats because fatty meats are not easy to dehydrate because of the fat content.
If you are using fresh meat, you will have to treat it in order to kill any harmful bacteria that may be present. After that, throw it into the freezer and freeze it for a few days. Once it’s fully cold, cutting the meat into thin slices will be much easier.
Beef is the easiest meat to dehydrate. Make sure you cut the meat against the direction of the grains. Also, never cut a slice that is thicker than a quarter inch.
The Process
The process of dehydrating food for long-term storage is pretty simple. The only challenging thing is to get the timing right. If your food slices aren’t extremely thin or too thick, the suggested time will do the work.
Since dehydration needs to be done on really slow heat to prevent the loss of nutrients, it’s a long process. For this reason, dehydrators with timers tend to work best.
When it comes to fruits, apples will take around six to eight hours to properly dehydrate. On the other hand, bananas can take up to ten hours, while berries need more than twelve hours for dehydration. Some veggies will be good to go in a couple of hours, but others will need up to sixteen hours.
Storing The Right Way
Airtight containers are vital for the long-term storage of dehydrated food. Among some of the handiest options are sealable buckets, cans, and plastic or metal containers that come with a seal. It is crucial that the container you pick is airtight. Otherwise, the oxygen will cause the food to oxidize, minimize the shelf life of the food, vitamin content, and lower the nutritional value.
Conclusion
Using a dehydrator is an excellent way to boost your long-term survival food storage. We recommend using a mix of food items like fresh fruits and veggies because they are loaded with healthy vitamins and minerals to keep you feeling at your best during this stressful time. In order to rehydrate the food to eat it, you’ll also need to have a fresh water supply on hand, which Stealth Angel can help with.
For all of your outdoor and urban survival needs, be sure to check out Stealth Angel Survival, the premier site to find essential outdoors, hiking, camping, adventure, and survival equipment.
Sources:
https://www.ifrc.org/en/what-we-do/disaster-management/about-disasters/what-is-a-disaster/
https://ods.od.nih.gov/factsheets/VitaminA-HealthProfessional/
https://www.webmd.com/drugs/2/drug-322/ascorbic-acid-vitamin-c-oral/details
Everything You Need To Know About The Rule Of Threes In Survival

A number can have a lot of power. If you are new to the exciting world of prepping or survival, you may not be familiar with the lingo yet —and that’s perfectly fine because that’s why you’re here! One of the rules we have amongst preppers and survivalists is called the Rule of Threes.
The Rule of Threes states humans can survive:
- Three minutes without oxygen.
- Three hours without shelter.
- Three days without water.
- Three weeks without food.
Note that this isn’t a guarantee. Take shelter, for instance.
If you fall into a large body of cold water and get stuck, it is highly unlikely you will last three hours. However, if you end up on dry land with nice weather, chances are you may live for over three hours.
These rules are to act as a guide and are a great quick reference that can help individuals understand their priorities when in an emergency situation, focus on what needs to be done and fall back to that to fight off confusion or fear.
Want to learn more? Here is everything you need to know about the Rule of Threes in survival.
Rule Of Threes
Let’s break down the Rule of Threes, one by one.
Rule #1: Three Minutes Without Oxygen
Obviously, any condition that threatens your breathing —or the blood’s ability to circulate oxygen —is an immediate survival situation.Here are a few quick tips if you find yourself without air:
- If you happen to find yourself in an enclosed space without an immediate way out, check to see if there is a way of introducing fresh air into that space before working on your exit plan. It’s also a good idea to slow your breathing as much as possible —this will also help to keep you calm.
- Two very basic first aid skills that everyone should know are CPR and the Heimlich Maneuver. Breathing in air, however, is just the first step –oxygen then needs to be circulated throughout the body, which is where CPR comes into play. Choking can happen in a blink-of-an-eye, often without warning, and when it happens, it needs to be addressed immediately. It’s critical to know how to perform the Heimlich Maneuver on someone else as well as on yourself.
Rule #2: Three Hours Without Shelter
The environment you are in is going to play a major role, but let’s assume most survival situations don’t happen on a warm, cozy beach. Odds are temperatures, rain, wind, snow, or worse will be involved, which accentuates the need for a good shelter. Remember, you only have three hours to shelter yourself in the toughest conditions.
Here are a few quick tips for surviving in the cold:
- Insulate your shelter by filling in any gaps in the building material.
- Avoid building your shelter in cold sinks. These are low areas where the temps will be much colder.
- Smaller shelters will be much easier to keep warm with a small fire and will retain heat better.
- Move around. If you don’t have a fire, be sure to do light exercises and work large muscle groups to generate heat.
Here are a couple of quick tips for surviving in extreme heat:
- Before you do anything else, set up a simple shelter first to avoid heat exhaustion. Keep in mind that shaded areas can be up to twenty degrees cooler than surrounding areas.
- It will help to keep a shelter cooler if there is a way for air to circulate through it.
There are many forms and styles a shelter in the wilderness can take, but in most cases, simplicity is best. Use fallen trees as a starting point – their size can often create little nooks and crannies after they’ve hit the ground that can be used as the skeleton of your eventual shelter.
Bringing packable survival tarps or blankets is also a smart way to stay ahead of the game. Paracord and a good survival knife are essential for shelter creation, and you would be surprised what you can become capable of with only a blade and some paracord as construction tools.
Rule #3: Three Days Without Drinkable Water
Water is essential for life —especially in the short term.
Go even one day without H2O in a survival situation, and you are sure to feel its effects. While some individuals have been known to go longer than three days without water, this is not something to mess around with.
Here are a few quick tips for finding H2O in the wild:
- Use an absorbent material -—like a cotton t-shirt -—to collect morning dew off of plants.
- Dig into damp soil and wait for groundwater to seep in.
- Listen for moving water, such as a river or stream.
Once you find a source of water, it will need to be thoroughly cleaned to prevent you from getting sick. You can do this by using your Stealth Angel Personal Water Filter, which eliminates 99.9999% of bacteria. It’s also a good idea to keep iodine tablets on hand like the Potable Aqua Drinking Water Germicidal Tablets, which work to not only kill bad bacteria but also eliminates viruses and giardia.
Rule #4: Three Weeks Without Food
How long a human can survive without food really depends on the amount of fat and muscle that person has in their body. As uncomfortable as it may be, we can go a pretty long time —roughly three weeks —without eating a single thing.
In fact, food should be the lowest priority —but not ignored. Like with water, going without food for significant periods of time is not only uncomfortable but also reduces your ability to think and perform.
Here are a handful of quick tips for finding food in the wild:
- Insects like crickets and beetles are usually safe to eat, but bugs like spiders, scorpions, and centipedes are not.
- Stay away from bright colors. Generally, if something is a bright color, whether that is a plant or insect, chances are it is highly poisonous.
- Don’t eat a plant unless you can positively identify it. Many plants are toxic and look identical to other plants, so be sure you know exactly what plant you are working with before putting it in your body.
- Cook your food when you can. By doing this, you will kill off most of the parasites that might be living in the animal you are about to eat.
A Final Word
Survival is never easy, even in the best situations, and if you happen to find yourself in a survival situation, you’re probably not starting out in the best shape. However, with a little bit of knowledge, research, and following the good old Boy Scout motto of “Be Prepared,” you can help tilt the scales in your odds a little bit more.
Being prepared for an emergency can make all the difference in a survival situation. You can do this by first understanding the Rule of Threes, but secondly, by putting together an emergency survival kit.
Your kit should include all the essentials like a water filter, food, a flashlight, a survival knife, and of course, a first aid. Not sure where to get supplies? Check out Stealth Angel Survival.
Stealth Angel Survival is the premier site to find essential outdoors, hiking, camping, adventure, survival equipment, emergency preparedness kits, disaster aid supplies, and more. Whether you are planning for a camping trip with your family or stockpiling supplies, Stealth Angel Survival has everything you need.
Sources:
https://paleoventures.org/rules-of-3-for-survival/
https://www.medicalnewstoday.com/articles/324712
https://www.mayoclinic.org/first-aid/first-aid-choking/basics/art-20056637
