Stockpiling Emergency Food? Stay Away from Grocery Stores
In early 2020 stores all over the country ran out of items like canned protein, powdered milk, and of course… toilet paper. And when they were in stock, there were limitations placed on the number of items we could purchase.
But here’s what many people got wrong. And they’re still getting it wrong. They believe the grocery store is the place to go to put together their food stockpile. There are a number of reasons why that kind of thinking is wrong. Let me share a few of them with you today.
Shelf life is key
When it comes to a food stockpile, anything with a shelf life of less than five years is a waste of money. You can do a lot better than that.
For most food items, even non-perishables, the shelf life is much shorter than five years. Do you really want to spend a lot of time checking expiration dates and rotating food in and out of your stockpile? Certainly your time is more valuable than that.
The single most important thing to consider when stockpiling food is making sure water has been removed from it.
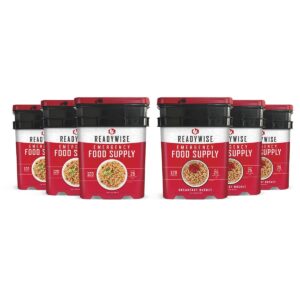
And yes, some grocery stores sell freeze-dried and dehydrated foods, but the shelf lives are usually far shorter than what you can get with survival food. Many of them don’t even include a basic oxygen absorber.
Get the water out
Now, you may be saying, “OK, Frank, I realize freeze-dried and dehydrated foods are better for an emergency stockpile than most canned foods and other grocery store items. But what about taste, nutrition, variety, and price?”
I’m glad you asked, because when it comes to a stockpile, survival food has the competition beat in every category.
As I mentioned earlier, moisture removal is the key to making food last a long time. Whenever water or oils remain inside a container of food, bacteria will form. And that bacteria will probably destroy your emergency food supply long before you need it.
With freeze-drying, food is quickly frozen to begin the process. Then the ice is turned into water vapor and removed by placing the frozen food in a vacuum.
With dehydration, water is removed via evaporation. Hot air is introduced into a chamber containing food until the liquid becomes a gas and floats away.
Taste & nutrition
Unlike canned food you get at the grocery store, which can lose its taste and nutritional value over time, freeze-dried and dehydrated food tastes as good and fresh as the day it is packaged.
When food is frozen, microorganisms are unable to grow. Freeze-drying and dehydrating food removes nearly all moisture.
Once food is freeze-dried or dehydrated, it’s simply a matter of packaging it properly in airtight bags. Such as bags made of Mylar. And then storing it where it can’t be contaminated by the elements and pests.
This process also helps freeze-dried food retain its nutritional value better than most canned food. Without the use of harmful chemicals.
Variety & protein
When many people hear “freeze-dried” or “dehydrated,” they first think of fruits and vegetables. And those are certainly items you should stockpile.
But freeze-dried meat can also provide plenty of nutrition. Including much-needed protein, minerals, and other nutrients.
Why is this important? For one thing, if a crisis goes on for more than several days, you’re going to need something other than fruits and vegetables.
For another, the stress you’ll experience during an emergency will raise your cortisol levels. That means potential muscle loss. Maintaining strength will be a must in a crisis. Meat will be key in your diet.
Cost & digestion
People sometimes worry about the cost of freeze-dried and dehydrated food. But prices only seem higher because those foods are often sold in bulk.
By using a calculator, you realize you’re actually saving money by purchasing freeze-dried and dehydrated food for your stockpile.
This is especially true when you factor in all the non-freeze-dried and non-dehydrated food that gets thrown away after it expires.
And if you’re concerned about freeze-dried and dehydrated food being more difficult to digest, well, that’s another myth we’ve heard. The fact is, it’s actually more easily digested because it does not contain additives or preservatives.
They don’t sell peace of mind at grocery stores
When freeze-dried and dehydrated food is properly stored, it can stay good, tasty, and nutritious for up to 25 years.
That means keeping it in a cool, dark, dry place. Where air, light, moisture, insects, and rodents can’t get to it.
So, if you decide to start an emergency food stockpile – or add to the one you’ve already started – stay away from the grocery store.
Let’s face it. The folks who run grocery stores want you to eat up your food as quickly as possible so that you’ll return and buy more soon. At 4Patriots, we want you to have food that will be ready when you really need it.
The only way to achieve true peace of mind when it comes to feeding yourself and your family when things go south is by stocking up with survival food. And you’re not going to find it at the grocery store.
Keep Food Cold Without Electricity?
Have you ever felt good about loading up your refrigerator and freezer with food and beverages, only to experience a power outage?
If that has ever happened to you – or even if your refrigerator and freezer were no more than half-full when a blackout occurred – you probably wondered if those contents would stay edible prior to the power returning.
The United States Department of Agriculture offers this guideline. Anything left unrefrigerated for over four hours at temperatures of 40 degrees Fahrenheit or higher is at risk of developing food-borne bacteria that could lead to illness.
Even if your food stays frozen, you don’t want to keep it frozen for too long before eating it. Registered dietician Allison Tepper has offered some tips regarding how long certain foods can maintain their flavor while frozen.
To summarize her thoughts, cooked meats, soups, casseroles, rice, and pasta should stay good when frozen for two to three months. Cheese can stay tasty for six months, nuts and herbs for a year, and flour for two years.
Before a power outage …
Let’s go over some before, during, and after advice for keeping your food cold during a blackout.
Before a power outage, know what the temperatures are inside your fridge and freezer. A new refrigerator might show those temps on an outside display so you don’t have to open either to find out. Otherwise, use the inside thermometers.
Freeze containers of water and gel packs, and keep several coolers handy, depending on how much food you normally keep in your fridge and freezer.
If you don’t have a cooler, buy plenty of ice to keep in your freezer and be ready to place it up against the food you most want to keep cold.
During a power outage…
Keep your freezer and refrigerator doors closed. The more often you open those doors during an outage, the warmer the contents will become.
By keeping your refrigerator and freezer doors closed, food should stay safe for up to four hours in the fridge, 48 hours in a full freezer, and 24 hours in a half-full freezer.
After those hours pass and the power is still out, place your frozen containers of water and frozen gel backs into your coolers, along with your food.
Periodically check the temperature within the cooler, but not too often, as you don’t want to add warmth to the inside by opening it.
After a power outage…
Once your power is back on, you may be tempted to smell or taste your food to see if it’s still good. The problem here is that food can go bad without smelling bad. And even a small taste of a food item that has spoiled could make you sick.
Be especially careful with meat, fish, cut fruits and vegetables, eggs, milk, and leftovers. When in doubt, throw it out.
Check the temperature of your food that you attempted to keep cold. If it’s above 40 degrees, get rid of it.
If any of your food has changed color or texture, toss it out. But it’s OK to re-freeze thawed food from your freezer if its temperature is 40 or lower. Even if you see some ice crystals.
4 more cooling hacks
Let me conclude with 4 additional hacks for keeping food cold without electricity:
A zeer pot is made up of two different-sized unglazed clay pots. Place the smaller one inside the larger one, with sand filling the space between them. After putting food in the smaller pot, pour cold water into the sand. As the water evaporates, it will cool food in the smaller pot.
The same type of evaporative cooling can be accomplished by placing food on a shelving unit, wrapping fabric around that unit, and pouring cold water on the fabric, periodically adding more water. It works even better if a breeze is reaching the shelving unit.
Campers and backpackers have used this food-cooling trick for many years. Evaporation helps running groundwater stay cool, and the more movement the water experiences, the cooler it becomes. Food that’s fully secured in a container and placed in that water will stay cool.
Many years ago, our forebears discovered their food would stay cooler and fresher when placed underground. This can be done by hanging food down into a well. Or better yet, by digging out a root cellar, which is particularly effective for root vegetables such as carrots and potatoes.
Losing power is a bummer, but it doesn’t necessarily mean you have to lose the food you keep in your refrigerator and freezer. The above advice can help you get through the outage without having to toss out the food you worked hard for.
How to Preserve Your Favorite Fruits
Have you ever been in the middle of eating a piece of fruit and suddenly notice it has mold growing on it? Not only is that gross, it could make you sick.
Mold can grow inside the soft flesh of fruit where you can’t see it until you’ve taken a few bites. Generally, mold will spread faster on soft fruits than on hard ones because it more easily penetrates into softer flesh.
While some people might not be affected by eating a small amount of mold, others can have issues. People might experience symptoms like allergic reactions and/or respiratory problems, nausea, vomiting, gas, and diarrhea.
Watch out for mold
Folks who should be particularly cautious when it comes to moldy fruit are the elderly and immunosuppressed.
Even if not in either of those groups, folks with sensitive stomachs should also be especially careful. And, of course, those with mold allergies need to keep a close eye on their fruit before they eat it.
Some molds are classified as mycotoxins, which are sometimes found in apples and grape juice, as well as on grains, nuts, and celery.
There are people who can easily handle a small amount of mold on fruit without having any issues. But even their health could be negatively affected by long-term exposure to mold.
If you discover moldy pieces of fruit inside a container, throw them out, as well as any pieces of fruit touching them. Closely examine the other pieces before deciding to eat them.
Your preemptive strike
Let’s take a look at some ways to keep your fruit from going bad. Each of these takes a little effort, but it’s time well spent. And is certainly preferable to falling ill.
First I want to mention a preventative. Building up your gut microbiome could help you fend off the ill effects of eating mold, should you happen to accidentally do it.
And the way to shore up your gut is by eating fermented foods. Such as yogurt, kimchi, and sauerkraut.
Another strategy for helping healthy bacteria grow naturally in your gut is by drinking pomegranate juice.
13 tips for food freshness
Now for those tips to help you keep your fruit safe to eat:
- Buy only as much fruit as you plan to eat before your next grocery store run. In other words, don’t give it time to go bad.
- Rinse berries in warm water. Then place them in a bowl with water and 1/4 cup of vinegar. Let them soak for 10 minutes before rinsing with water and drying on a paper towel or cutting board. Store in an airtight container in the fridge, where they should be good for up to 3 weeks.
- Separate bananas from the bunch and wrap each individual stem in plastic wrap. This will slow down the spread of ethylene gas. If your bananas do become too ripe to eat, store them in the freezer and use in smoothies.
- Tomatoes shouldn’t be refrigerated. Doing so will negatively affect their texture and flavor. Leave them on the counter and place them stem side down.
- If you’re heading out on a day trip, soak apple slices in a salt and water mixture before placing them in an airtight plastic bag or other container. This helps prevent browning.
- Instead of cutting a lemon in half if you only need a little of its juice, consider puncturing it with a skewer and squeezing out what you need. Then place it in an airtight baggie in your fridge.
- I’m sure you’ve noticed that avocados turn brown quickly when cut open. That’s due to their enzymes that produce a brown pigment when exposed to oxygen. Squirt them with lemon or lime juice after cutting them open, and store them with chunks of onion.
Because fruits and vegetables often go together, here are a few tips for keeping veggies fresh:
- Place asparagus upright in a cup of water with the cut edges submerged. Put the cup in the fridge with a plastic bag over the tops of the asparagus.
- Keep your carrots soaking in water, sealed with plastic wrap, and stored in the refrigerator. Another option is wrapping them in bubble wrap before refrigerating them.
- Place leftover leaves of lettuce in a bowl with a paper towel on top, then seal with plastic wrap to prevent leaves from turning brown and wilt-y Some people like to sprinkle a small amount of salt on their lettuce leaves to remove more moisture.
- A mesh material will help onions stay fresh because it allows enough air to seep in. You can even use new pantyhose for this, tying a knot between each bulb.
- Potatoes have a pretty good shelf life without much help, but eventually sprouts will show up. One of the best ways to keep them fresh is by storing them with apples. They love the ethylene gas from apples.
- Ethylene gas is good for potato freshness, but not so much for celery freshness. Wrap celery in aluminum foil, which will allow gas ethylene to escape.
Fresh fruits and vegetables not only taste better than food that’s been sitting around a while, they’re also better for you. I hope you’ll use some of the tips above to keep your food fresh. And feel free to add some of your own ideas in the comments section below.
[VIDEO] Power, Food & Emergency First Aid All in Your Trunk?
Eric J. gives a review on the most-comprehensive Emergency Car Kit on the market. The Patriot Power All-in-1 Emergency Car Kit … a 95-piece Car Kit packed full of critical survival tools, that you can pull out at a moment’s notice. Just open your trunk!
The Inside Scoop 🎬:
- Eric J. from Florida provides a review on the NEW Patriot Power All-In-1 Emergency Car Kit.
- The Kit comes in 3, clearly-labeled, zippered cases: power, food and safety … 3 unique car safety kits in 1.
- The jump box included in the power kit can be used as a power bank for USB charging or for jump-starting vehicles. Eric jumpstarted his F250 2004 diesel 6.0 with two dead batteries.
- The emergency safety kit includes items such as ponchos, first aid kit, hand warmers, emergency blanket, road warning light, gloves, flashlight, tools kit, reflective triangle, glow sticks, and a wire brush set for battery maintenance.
- The emergency food kit contains vacuum-sealed lemon-flavored food bars and water pouches, which Eric and his wife Michelle sampled.
Transcript 🎞️:
“Hey everyone, welcome back. Today’s video is sponsored by 4patriots.com. They sent me this kit and they wanted me to check it out on an honest review. Thank you 4patriots.com for sending this free to me.
So, let’s check out the Patriot Power All-In-1 Emergency Car Kit. So in this kit you have three different zipper cases here. Each one has a different purpose. The emergency safety kit, the emergency food kit and another emergency kit – doesn’t have a name on it. Let me show you why.
Okay, we’re going to look at each one of these individually. And I could tell you that in this one here, I’ve already used the components in this one. Okay.
So, right here we have the four Patriots jump box with the included cables… can be used as a power bank for USB charging your phones or a jump start here like I’m going to do now to start my truck. Now this is a diesel and 6.0, 2004 Diesel. And I do have two batteries in here. Now, this one was replaced not too long ago. The reason that it’s dead is because of this one. This is not the same battery, and it is dead inside. Now make sure this is fully charged for you to use it. And basically, you could take this positive right on here, take this negative right on here a little bit right on the bad battery because these are in parallel. So that battery over there is okay, but when you have a dead one hooked and parallel, this is draining that one. Now, what we’re going to do is hold the power button until you see the lights come on like this indicates a full charge and we’re going to hold jump start and then you’ll see the green light. We’re ready to jump start. now I’m going to turn the key. See what happens. I can even hear ready. There you go, start it right up and if it’ll start a 60 diesel it’ll start the average passenger vehicle.
This unit right here I gotta tell you if it will start an F250 2004 diesel 6.0 with two dead batteries, okay, it will start pretty much anything. And on top of this, you also have two 5 volt 3 amp output USB outputs. So, you can charge your phone on this. You can use it as a battery bank. You can plug in 12 volt 6 amp output, and it’s in my room or uh on the table there, there’s a wall charger as well.
In this kit you have, this is funny, you have an air compressor. There’s actually a couple different items in here. An air compressor, okay. I have not used the air compressor, and you know, I haven’t had to use it yet, but this air compressor has a battery in it in itself. You see that? And this will inflate more than just your tire if you have a flat tire. It comes with this here, you would basically screw this on like this. And then you can attach it to your tire, and there you go. Alright. It’s running. It’s fully charged you can set your PSI on here. And if you wanted to just use this for let’s say a raft or a basketball there’s a charger for that. But in here you can see there’s a bag here for a needle for a basketball, for different inflation, you know for a raft, for a uh a balloon or or whatever. It’s multi-purpose. It’s more than just for tires. And this charges via USB-C here, and it looks like it also has a USB output as a battery bank as well.
Now, the emergency safety kit and the emergency food kit. So, let’s go with the emergency safety kit first. Let me show you what we have. Emergency ponchos in the event that you’re in the rain or your, you know, on the side of the road you need a poncho. We have a first-aid kit in here. Always good to have a first aid kit. There’s some safety pins in here. There’s some tape, there’s some Band-Aids, forceps right here, And we have tape, you know, bandage tape. So, a little emergency first-aid kit. Okay, these are air activated hand warmers. This is an emergency blanket. If you unfold this blanket, if you had to if you were freezing in your car or outside, you can put this blanket around you and it’s going to trap as much body heat as possible. This is 75% alcohol wipes. A USB rechargeable road warning light. This will potentially save your life if your vehicle is stranded or you are pulled over on the side of road, or you’re on the side of a mountain somewhere, or you know, out in the snow. I mean, this has multiple patterns it looks like. It can be used this way on the you know flat it could be used standing up, if you want to do that, okay. Some gloves. They got the silicone here. They may be for warmth, but man you can grab anything in the snow, or wherever. That’s very, very, rubberized sticky. Who doesn’t need a flashlight? It blinks, okay. It’s quite bright. Look, small, wide, small okay. A small tools kit. Aow it’s got sockets here. So that was a 12 millimeter, eight millimeter okay. Metric with a little screw handle here okay. And some screw bits. You never know when you’re going to need a screwdriver. This is an a reflective triangle. So this goes like this okay. And you have an emergency triangle. And this way it’s reflective this between this and the little uh battery powered road flare. You can get visibility so that you don’t get struck by a vehicle. We also have emergency glow sticks. Snap! Here you go, look at that. A glow stick. The last thing in this kit is the three piece wire brush set. Y’all know, man. I mean, battery terminals get corroded. all it takes is corrosion on a battery terminal in your battery. When you’re at a gas station 400 plus miles from home to find out that you’re not making good connection. And instead of asking or using your jump start here, you can use your hopefully your little kit here, to loosen the battery terminal and use the the brush here, clean off terminal and get a good connection. So wire brush always good to have.
Alright, so the third one and Michelle wanted to sit down now and check this out, right Michelle? So this is the emergency food kit. Okay, so this is one pack of emergency food bars. These are lemon flavored. Now, these are vacuum sealed. And a bunch of water pouches, emergency drinking water, honey, split one of those open and put it here. We’re gonna try one of these because I know it’s just water. Try it real quick. Let’s see. You know, if you had to survive. What does that water taste like? Wow. Wow. It tastes like regular water. Yeah! I mean you could drink this out of a pouch because you’re not going to have a cup with you.
Alright, well that about wraps it up for this video. And thank you to my beautiful wife for being a part of my video once again, whether it be a cameraman or a woman or help me eat a food bar and check this stuff out. You know, you never know when you’re going to be in a disaster or an emergency situation where you need stuff like this. The honest truth is you can go to a lot of places and get stuff like this. It’s not a secret, but 4Patriots made it very convenient to have everything covered in a convenient car carrier like this with just about everything you would need. I appreciate 4patriots.com for sending me this to check out. Brand new from them and that’s pretty much it.”
How to Choose the Best Portable Charger
For many of us, we don’t have to stretch our imaginations much to picture living without a cellphone.
We spent the majority of our lives without one, never even thinking about what it would be like to carry a phone everywhere we went.
Now, of course, very few of us live without one. And we almost always take it with us when we leave our homes and have it nearby when we’re indoors. This safety net has saved lives and added many conveniences to our day-to-day activities.
But our cellphones and other electronic devices are basically worthless when they run out of juice. So, another essential item we should carry with us when we leave the house – and keep near us when we’re home – is a charger.
Make sure it’s solar
If you don’t have a portable power bank for your electronic devices, you may want to seriously consider getting one. And if you do have one, you might want to determine whether it possesses all the qualities it should.
Today I want to discuss what to look for in a charger. Because once you decide which elements are most important, you’ll be better able to choose the charger that’s right for you. And acquiring one sooner rather than later means you’ll be able to take it on your summer and holiday travels.
First and foremost, your charger should be solar-powered. Now, you want to be able to power it up through an outlet as well, but you also want to be able to charge when you don’t have access to an outlet or during a power outage. So, it should have a built-in solar panel to take care of that.
The added advantage of being able to charge your power bank with the free rays of the sun is you’ll never have to worry about the internal battery wearing out.
Other important features
A second consideration when it comes to deciding on the right solar charger is the amount of power it produces. The more watts of electricity it can generate, the better. If it has at least a pair of USB ports, you can charge two electronic devices at the same time. Three is better.
Third, you want a solar charger with a built-in battery pack. A lithium-polymer battery that can store 8,000 mAh and pass TSA regulations for carry-on batteries is ideal.
Fourth, you want a solar-powered charger that is portable so you can carry it around in a pocket.
Fifth, your solar charger should be compatible with whichever devices you want to charge.
Sixth, your solar charger should be durable enough to withstand some bumps and drops. Make sure it’s rugged to withstand the elements.
With frequent power outages pretty much everywhere you go, it’s more important than ever to have convenient backup power at the ready. A pocket-sized power plant is the answer when other power sources are unavailable. Just make sure you get the right one with all the features you need.
Grow Your Own Food to Fight Inflation and Food Insecurity
We hear a lot about the future of technology these days. Especially as it pertains to artificial intelligence.
But when it comes to food, the future may be directly tied to the past. Many people are starting to do what Americans did prior to the industrial revolution – grow their own food.
Why? Because food insecurity is becoming more of a problem all over the world, including in the U.S. And inflation has surpassed incomes, with food costs spiraling out of control.
The best way to protect against food insecurity is to plant, nurture, harvest, and eat fresh, nutritious foods.
Superior Taste & Longevity
Many Americans are growing crops in their own backyard gardens. When that’s impossible for one reason or another, they rent a space in a community garden close to home.
Their garden crops produce vegetables and fruits they can eat during the spring, summer, and fall. And when they can grow enough, they freeze the remainder for the winter.
Now, obviously they can’t grow every food item they need or want. But now they spend far less time and money at the grocery store.
And because that food does not have to travel from a farm to a store, and doesn’t sit around waiting to be displayed, and doesn’t remain on display in that store until it’s purchased, the taste, longevity, and nutritional value are superior.
Overcoming Roadblocks
Before getting into the nitty gritty of growing your own survival garden, I want to mention a few obstacles you may need to overcome.
First is pests. Bugs are an issue for most gardeners. If pests destroy your survival garden, your work will have been in vain. You want to stock up on products you’ll need to keep your garden pest-free.
Animals can also be considered pests, but now we’re talking about those with fur. Depending on where you live, deer, rabbits, squirrels, and other animals will appreciate the fine dining they can do at your expense if you don’t keep them out with fencing or an electronic deterrent.
Weather can also be a huge obstacle. You never know when a severe storm, flooding, or drought may occur. But by studying your area’s weather history, you can determine when the best times are to plant and harvest.
Another issue might be soil quality. Again, this will differ considerably depending on where you live. But if your soil is not healthy, churn it up to a depth of 6-8 inches. Add 4-6 inches of organic matter such as peat moss or compost, blending it with your soil.
Seed Selection & Planting Know-How
An extremely important component of growing your survival garden is choosing seeds to plant and knowing how to plant them.
You should acquire only the highest quality heirloom seeds for your garden. They should be 100% non-genetically modified, open-pollinated, and placed in sealed packets to allow for long-term storage. They can be grown, harvested, and replanted endlessly.
One way to do this is buying a pre-made seed vault from a reputable seller. Those seeds will have varieties that are zone-friendly to most growing regions.
You could also visit local seed sellers, including farmers markets, farm stands, nurseries, or garden centers. Or you could buy through seed catalogs offered by companies that have been around for a significant amount of time.
A Handful of Planting & Harvesting Tips
Here are a few tips for seed planting and harvesting.
- Plant different bean seeds far away from each other to avoid cross-pollination.
- Collecting corn seeds: Closely examine the plant & the ears of corn. Choose the best ears from the earliest-bearing plants.
- With eggplant, when the fruit turns from firm and glossy to dull and somewhat puckered, the seed is ready to harvest.
- Collect & store melon seeds when melons are ripe enough to eat.
- Harvest the strongest pea plants for seeds. Wait until pods are ripest to collect seeds.
- Let peppers ripen beyond the eating stage before collecting their seeds, which will be ready when the fruit is no longer green.
- When spinach leaves turn yellow, the seeds are nearly mature. The leafiest plants should be chosen for seed saving.
- Squash seed is usually collected around the same time of the first fall frost. Allow the seeds to dry for two weeks.
- Harvest tomato seeds when the fruits are fully ripe.
- Carrot seeds should be harvested when they turn brown in the early fall.
We’re just scratching the surface here as far as growing your own food is concerned. There’s much more you can learn through research.
The important thing is to get started on it now while the weather is good. You’ll be able to grow nutritious vegetables and fruits that you can enjoy this fall, and perhaps you can store some for winter months as well.
Happy gardening!
Does Your Vehicle Emergency Kit Include These Items?
With summer in full swing, it will be at least four months before we have to concern ourselves with the possibility of getting stuck in a snow-covered ditch or finding ourselves in a gridlock of vehicles due to wintry weather.
And that means you don’t need an emergency kit in the car, right? Wrong. There are many factors other than blizzards that could cause you to get stuck or stranded somewhere while you’re driving this summer.
Whether you drive a car, van, or truck, you could experience a number of roadside issues that could leave you waiting hours for help.
Violent storms can cause accidents. Accidents can cause major delays on roadways with the nearest exit miles away. Then of course there are mechanical issues, flat tires, and so on.
So wherever you are, wherever you’re headed, it’s important to always have an emergency roadside assistance kit on hand.
Keeping an emergency kit in your car is a no-brainer no matter what month of the year it is. Today I want to share what I feel are the 17 most important items to include in that kit. Of course, always keep your gas tank as full as possible and your cellphone charged up.
- Water. If your car stops running, it’s going to get very hot this summer when you’re stuck somewhere. Staying hydrated until help arrives is essential. Keep your water in pouches that can withstand the heat.
- Non-perishable food. Granola bars and trail mix come to mind immediately, but you also want to make sure you have food bars that can handle high temperatures.
- First-aid kit. The more comprehensive this kit is, the better. Make sure it includes bandages of different sizes, alcohol pads, scissors, pain relievers, hygiene items, and a lot more.
- Blankets. If you’re stuck for a long time, you’ll need some sleep, and it could get chilly in your car overnight.
- Ponchos. Fixing a flat or walking to the nearest shelter in the rain won’t be fun. But at least with a poncho most of your clothes can stay dry.
- Tools. Including screwdrivers, wrenches, cordless drill & bit set, and socket & ratchet set.
- Fix-a-flat sealant and air compressor
- Road flares
- Flashlight. Tactical is best because of its many features. If all you have is a standard flashlight, make sure to include extra batteries.
- Jumper cables
- Glow sticks
- Work gloves
- Duct tape
- Copies of important documents including insurance papers and health information
- Emergency radio
- Reflective vest
- Windshield washer fluid
What’s the best thing about having an emergency car kit? Peace of mind. You know that no matter what happens, you’ll be prepared.
A vehicle emergency kit is an absolute must if you’re planning to leave your driveway this summer. And the more useful items you can include in it, the better your chances of dealing effectively with any problem you encounter.
Is Putin Going ‘Buggy?’ Russia Accuses U.S. of Mosquito Masterplan
Mosquitoes are annoying. They’ve ruined many backyard barbecues and hikes through the woods.
They can also be dangerous. Especially for those who are allergic to them or when those bugs carry diseases including life-threatening malaria.
But a weapon of war? That’s the latest buzz. And it shows to what extent Russian President Vladimir Putin is willing to go to swat attention away from his ineffective military campaign against Ukraine.
Recently a Russian official accused the United States of planning to target Russian troops with drones carrying genetically modified and malaria-bearing mosquitoes. I’m not making this up.
One newspaper reported that America might even be itching to unleash these killer mosquitoes in Moscow, the Russian capital. There’s no word yet on whether the Kremlin believes that a handshake with an American official could transmit cooties.
Allegation Follows Ukraine Advances
Igor Kirillov is the head of Putin’s Radiation, Chemical, and Biological Protection Troops. His claim came on the heels of Ukraine’s announcement that it had recaptured from Russia the village of Piatykhatky in the southern Zaporizhzhya region.
It marked the eighth recaptured village in the area during Ukraine’s two-week counteroffensive. Russia’s bizarre statement also followed Ukraine’s declaration that it had killed or wounded more than 4,800 Russian soldiers – and captured 80 others – in just a week’s time.
Kirillov said that America’s goal with this strange strategy was to infect Russian troops with malaria or the West Nile virus in order to incapacitate them.
He said, “The high technical level of U.S. preparedness for the use of infected vectors is evidenced by a patent for a drone designed to spread infected mosquitoes in the air.
“The description of the patent emphasizes that the infected soldier is not able to perform the combat missions assigned to him.”
Was Dam Collapse Caused by Russian Explosives?
Kirillov’s stinging rebuke of the U.S. included a mention of a drop in the water level, which could result in a rise in mosquitoes infected by West Nile.
A Ukraine reservoir the size of the Great Salt Lake in Utah was recently attacked, causing flooding that has destroyed homes and farmland.
More than 11,000 people have been evacuated from the area, and at least 52 have died from the flooding.
Bad blood between the nations resulted in both Russia and Ukraine blaming each other for the attack on the reservoir. A legal team of experts said it was “highly likely” the collapse was caused by Russian explosives.
‘Allied Insects’ Is Latest Russian Paranoia
Kirillov actually charged the U.S. with the Kakhovka dam attack, saying it was part of America’s mosquito masterplan.
“The flooding of Kherson region planned by the Kyiv (Ukrainian) regime can complicate the situation, including with regard to arbovirus infections,” he said.
Another Russian official, Irina Yarovaya, referred to the alleged U.S. tactic as “Allied Insects.” She is head of Russia’s Parliamentary Committee for Security.
While dropping disease-carrying mosquitoes from drones is an outlandish accusation, there is a likelihood of diseases spreading from the dam collapse.
In fact, the Russian army has recently suffered a cholera outbreak with soldiers being admitted to military hospitals daily with suspected cases of the bacterial disease.
Is Mosquito Claim Part of Russian Strategy?
Ukraine President Volodymyr Zelensky responded to the mosquito accusation by tweeting, “Everyone who chooses the path of evil destroys himself.
“For a long time, Russia used propaganda to mask its weakness and the stupidity of its government. And now there is so much chaos that no lie can hide it.”
While it’s easy to laugh off a biting accusation such as the launching of disease-carrying mosquitoes via drones, it does make one wonder. In the past, Russia has been known for making extraordinary and obviously false claims because it was planning similar operations.
That way, if Ukrainian soldiers were infected by genetically modified mosquitoes unleashed on them by the Russians, Moscow could claim that America’s tactic had backfired.
Of course, that’s highly unlikely as well. But Kirillov has asked the United Nations nuclear watchdog and the European Union to examine whether Ukraine is working on a “dirty bomb” to use against the Russian military.
Recent Insurrection Still Fresh in Minds
The extraordinary claim of an American plan to infect Russian troops with mosquitoes may also be an attempt to steer attention away from the recent insurrection led by Russian mercenary leader Yevgeny Prigozhin.
The head of the Wagner Group – a Russian paramilitary organization – denounced Putin’s military campaign against Ukraine, then sent his fighters from occupied eastern Ukraine toward Moscow in what he called a “march for justice.”
A deal brokered by Belarus leader Alexander Lukashenko halted Prigozhin’s convoy 120 miles south of the Russian capital. But the rebellion embarrassed the Kremlin and led to Putin lashing out at his former ally.
Putin accused Prigozhin of treason, called him “scum,” and declared his actions “a stab in the back of our country.”
Once Russia’s mosquito masterplan accusation runs its course, it will be interesting to see what ludicrous conspiracy theory Putin comes up with next. We may have only scratched the surface so far.
Protect Yourself from Summer’s Dangerous Heat
I’m going to play a game this summer. Every time I hear a weather forecaster use one of the words in the next paragraph, I’m going to take a drink of water, juice, or a sports beverage.
Here are the words: hot, heat, broiling, blazing, scorching, sizzling, sweltering, blistering, and oppressive. As well as phrases such as “fry an egg on the sidewalk” and “like an oven.”
Considering how hot it’s going to be in America this summer – and how many times we’ll hear about the heat from weather folks – I should be able to stay hydrated.
Actually, the extreme heat has already made its entrance. Just ask Texans. A headline from USA Today late last month read: “Oppressive and Unbearable Heat Wave Scorches Texas, With No End in Sight.” Temperatures reached 114° Fahrenheit in San Angelo and 113° in Del Rio.
El Niño Swoops in Early
Why is this happening? For one thing, temperatures continue to rise around much of the world. Each decade over the past 50 years has been hotter than the previous one worldwide.
For another, the El Niño weather pattern just took over for La Niña, earlier in the year than normal. El Niño conditions include above-average sea-surface temperatures resulting in higher-than-usual warmth.
The previous “super El Niño” (2015-2016) produced the hottest year on record. Excessive heat is the number one weather-related killer. According to the Centers for Disease Control and Prevention, an average of 658 Americans die every year from extreme heat.
Many of those deaths come from widespread blackouts due to strain on the electric grid. No air conditioning and food spoiling is a rough combination. Especially for the elderly.
Heat-Related Health Issues
Extreme heat can lead to a number of health issues. Including heat rash, heat cramps, dehydration, and heat stroke. Heat rash occurs when sweat is trapped in the skin. Symptoms range from small blisters to deep, inflamed lumps. Some forms are itchy. It usually fades when the skin cools.
Heat cramps are more serious. These involuntary muscle spasms are caused by fluid and electrolyte loss. Muscles most often affected are calves and arms. Also, the abdominal wall and back.
Another major problem with excessive heat is dehydration. This occurs when the body does not contain enough water and other fluids to carry out normal functions.
Prolonged exposure to high temps can cause the body to overheat. If left untreated, heat stroke can result in damage to organs. The longer treatment is delayed, the more serious the situation.
Ways to Chill in a Blackout
Here are some ways to stay cool during a power outage from safeelectricity.org and other sources.
- First, make sure your air conditioner is in good shape. Schedule an appointment with your AC maintenance company to confirm it’s ready for the summer heat.
- Remove leaves and other debris from around your AC unit.
- Dress in loose, lightweight clothing. Organic fibers like cotton and linen are best. Lighter-colored clothing will help reflect light and heat.
- Stay on the coolest, lowest level of your home as much as possible. Close off hotter rooms. Place a towel at the bottom of the door to keep warm air from seeping in.
- Use natural ventilation to cool homes & purchase battery-powered fans. (You can check out our wireless, rechargeable fan & cooling mister here.)
- Wait until evening to use a generator to power heat-generating appliances.
- Avoid physical labor. Reserve those activities for cooler portions of the day.
- Drink plenty of water and avoid heavy meals, caffeinated beverages, and alcohol. If you’re perspiring, drink fluids containing electrolytes.
- Keep refrigerator & freezer doors closed. If an outage lasts longer than 4 hours, remove meat, milk, and other dairy products from the fridge and pack in a cooler with ice.
- Use safe alternative food preparations, such as an outdoor barbeque grill.
- Keep a first-aid kit in your home and car. Including scissors, tweezers, safety pins, aspirin, eyewash, and rubbing alcohol or hydrogen peroxide.
- Close drapes and blinds on the sunny side of your residence.
- If the temperature is cooler outdoors than indoors overnight, open windows to let cooler air in. Hang a damp towel against open windows. Air will cool as it passes through the damp fabric.
- Take a cool shower at least once a day.
- Take your family and pets to a basement or other cool location. Also consider going to an air-conditioned public place during the hotter daytime hours.
- Check on friends and relatives – especially children, seniors, and those with medical conditions or disabilities.
And there you have it. Some of my favorite tricks to cool down and stay safe during the hottest time of the year.
8 Things You Should Never Store in the Heat
If you’re like most people, finding places in your home to store items you don’t use every day can be a problem.
We all accumulate a lot of stuff through the years. Including many things we don’t want to get rid of because every once in a while we need them. Or we want to give them away someday. But because we don’t use them often, we don’t want them cluttering our living spaces.
Many of these items end up in closets, basements, garages, and laundry rooms. In most cases, that’s fine.
But other than basements, some of those areas can get pretty warm. Especially garages. And certain items should definitely not be stored in an area where temperatures get too high.
High temps are a formidable enemy
Today I want to list 8 items you should not store in the heat. Each of them can be compromised or even destroyed by higher temperatures.
Canned food. It might seem like food inside a sealed can would be protected from outside elements, but that’s just not true. Temperatures exceeding 85° Fahrenheit can spoil food inside a can. Dampness inside a garage, for example, can cause cans to rust.
Wooden furniture. Perhaps you have old wooden furniture you want to gift to adult children or grandchildren, but they’re not quite ready for it yet. So, you keep it in the garage for now. Not a good idea. Temperature and humidity changes can make the wood expand and contract until it becomes warped.
Electronics. Heat and humidity, found in places such as garages, could render electronics such as PCs, printers, and gaming consoles useless. Their internal printed circuit boards will get fried. Heat-loving insects might also venture inside those items and damage them.
Clothing and bedding. If you keep either of these items in an area that gets a lot of heat, they’d better be in secure, temperature-proof containers. Otherwise, heat, humidity, and insects will produce considerable damage, including mold and mildew.
Spare refrigerator. This appliance does its best work when it’s in a climate-controlled room, generally between 65° and 78°. When stored in the heat, it will have to work overtime to keep contained items cold or frozen. And that means a higher-than-normal electric bill.
Photographs and records. As we age, there are few items we treasure more than our memories. And many of those memories are contained in photo albums. Keep them in a cool, dry, and dark place. In a hot area such as a garage, they can fade and get stuck together. Record albums warp in the heat. Books deserve a better home too.
Pet food. If someone is thinking, “It’s just a cat or dog. Who cares where their food is kept?” they probably shouldn’t own a pet. Warm temperatures can cause all kinds of food to spoil – including dog and cat food – so store bags of pet food at normal room temperature and keep them tightly sealed.
I saved one of the most important things to not store in the heat for last. It’s…
Batteries. As with food, water, and other essential items, batteries can go bad if not stored properly. It’s crucial to keep your batteries in the best possible shape. You never know when you’re going to desperately need them. Corrosion can occur when they’re stored in high temps. That can lead to dangerous leakage or even an explosion.
Where should I keep batteries?
So, if we shouldn’t store batteries in an area that experiences heat, where should we keep them? Glad you asked.
You’ve probably heard the old wives’ tale about extending battery life by storing batteries in your freezer. Perhaps you’re already doing that. This is something battery and survival experts have tested.
The majority has determined that storing batteries in a freezer does not extend their life. And in fact, it might make them less effective.
In storage, make sure opposing ends of batteries are not touching one another, and don’t store batteries with other metal objects. Keep the plastic caps on 9V batteries until they are in use.
And make sure batteries won’t be punctured or crushed while in storage. Keep them inside a container that cannot be smashed or otherwise damaged.
Energizer & Duracell chime in
Energizer officials state that storage in a refrigerator or freezer is not required or recommended for batteries produced today. Cold temperature storage can harm batteries if condensation results in corroded contacts, or label or seal damage due to extreme temperature storage.
To maximize performance and shelf life, store batteries at normal room temperatures (68° to 78°F) with moderated humidity levels. When stored at room temperature, cylindrical alkaline batteries have a shelf life of 5 to 10 years and cylindrical carbon zinc 3 to 5 years.
Lithium cylindrical types can be stored from 10 to 15 years. Prolonged storage at elevated temperatures will shorten storage life.
Duracell officials recommend storing batteries in original packaging, in a dry place at normal room temperature until ready to use.
It’s also a good idea to not mix old and new batteries, or batteries of different brands or types (for example heavy-duty zinc chloride batteries and alkaline batteries). Older batteries can drain energy from newer ones.
You want to get the longest life possible out of your batteries. How you store them greatly factors into their life expectancy. Keep them out of the heat.
